HPC introduction
General information and introductions for using the HPC
- HPC Information and login
- HPC Cluster Description
- HPC Tutorials
- Example SLURM Script (from video)
- Data transfer onto the HPC
- Issues Connecting to the HPC
- Patching and Pausing Jobs
- Accessing the HPC via Open OnDemand
- Managing your files and using the web Bash Shell in OpenOnDemand
- Virtual Desktops in Open OnDemand
- RStudio Open OnDemand Application
- Jupyter Hub Open OnDemand Application
HPC Information and login
Specifications
ASU Research Computing offers a three node Slurm cluster for use by researchers.
hpc1.its.appstate.edu
- 1 x AMD EPYC 7313P 16-Core Processor
- 128GB RAM
- 18TB Storage
- RHEL 9
hpc2.its.appstate.edu
- 2 x AMD EPYC 7543 32-Core Processor (128 threads)
- 1TB RAM
- RHEL 9
hpc3.its.appstate.edu
- 2 x AMD EPYC 7543 32-Core Processor (128 threads)
- 1TB RAM
- RHEL 9
The login node is available at hpc1.its.appstate.edu, it has 18TB of storage for processing. This is not for cold storage or archival. Please make sure you have your backups in order. We offer reasonably priced S3 storage through Wasabi for archiving. Data left on the login node after your jobs are complete may be removed to make room for other users.
The compute partition contains hpc2 and hpc3 which are the compute nodes.
*nix Operating System and Command Line Basics
The HPC cluster here at Appalachian State University run Red Hat Enterprise Linux 9. This is a very common operating system in these environments. Linux is a Unix-like operating system and interaction with the cluster primarily take place through the BASH shell over an SSH connection. Many of the topics covered here will also apply to other Unix and Unix-like operating systems such as FreeBSD, OpenBSD, Solaris and macOS.
Directory Structure
Unlike Windows and other disk operating systems Linux uses a tree structure, directories are mounted under the root (/) and other disks and drives are mounted as directories here as well. These can be visualized as nested folders much like how macOS and Windows do the same thing.

Your "home" directory will be under the /home so for example if your ASU user ID is plinketths the full path of your home directory is /home/faculty/plinketths. The other directories usually store specific types of data, /bin usually contains binary files or programs, /tmp is temporary data and is cleared on reboot, /var is variable data like logs and cache and so on.
On the HPC system you will mostly be working out of your home directory so it's important to know where that is and how to get to it.
Moving Around
Unlike with GUI based interactive paradigms you'll need to know a few text based commands to use the HPC. Whe you first login with a stand alone terminal application or open the VSCode terminal you'll be greeted with a prompt like this:
[plinketths@hpc1 ~]$
The basics here is that the prompt displays your username plinketths at @ the host you're currently logged in to hpc1 followed by your current directory ~. In Unix-like operating system land ~ is shorthand for your home directory.
If you want to move to another directory you can use the cd command for change directory. Another helpful command here is ls which is shorthand for the word list. Example below:
[plinketths@hpc1 ~]$ ls
data
[plinketths@hpc1 ~]$ cd data
[plinketths@hpc1 data]$ ls
hello_world.bsh slurm-53.out slurm-54.out
[plinketths@hpc1 data]$
Here the ls command was issued which showed that the home directory contained a sub-directory called data. Then cd was used to move into the data directory. The ls command was then issued once more to show the contents of the data directory. Note that when the directory is changed to data the prompt updated to reflect that.
Permissions 101
Being a multi-user operating system Linux has file and directory permissions that one has to contend with. Read, write and execute permissions exist for every file on the disk. First, let's look at how to view permissions using the ls command.
[plinketths@hpc1 ~]$ ls -l
total 8
-rw-r--r--. 1 plinketths plinketths 24 Apr 18 08:11 data.txt
-rwxr-xr-x. 1 plinketths plinketths 34 Apr 18 08:11 hello_world.bsh
drwxr-xr-x. 2 plinketths plinketths 10 Apr 18 08:13 other_data
The -l option on ls prints the long format of the directory, including the permissions in the first column, the third and forth columns are the user and group who owns the file. Examining the permissions portion on the data.txt it looks like one setting but it's actually three in one.
rw-
r--
r--
The first set is for the owner of the file, the second set is for the group and the last set is referred to as others, users who are not the owner and do not belong to the group. There is one letter for each permission r stands for read, w stands for write and x stands for execute. Looking at this text file one can note that the owner has read and write permission, the group has read-only as does the others.
The hello_world.bsh file is a shell script and has execute permissions for all three sets. As an exercise let's remove the execute permissions and see what happens:
[plinketths@hpc1 ~]$ chmod -x hello_world.bsh
[plinketths@hpc1 ~]$ ls -l hello_world.bsh
-rw-r--r--. 1 plinketths plinketths 34 Apr 18 08:11 hello_world.bsh
Now if the user tries to execute the script an error appears:
[plinketths@hpc1 ~]$ ./hello_world.bsh
-bash: ./hello_world.bsh: Permission denied
This is easily fixed by by adding execute permissions:
[plinketths@hpc1 ~]$ chmod +x hello_world.bsh
[plinketths@hpc1 ~]$ ls -l hello_world.bsh
-rwxr-xr-x. 1 plinketths plinketths 34 Apr 18 08:11 hello_world.bsh
[plinketths@hpc1 ~]$ ./hello_world.bsh
Hello, World!
[plinketths@hpc1 ~]$
The chomod or change file mode command is used to add or remove permissions from a file. The + symbol is used to add permissions and the - symbol is used to remove them. The u', 'g' and 'o' flags are used to specify which set of users the permissions apply to. If these are left off the command it defaults to applying the permissions to the owner, group and others. So to remove read permissions from others issue the following command:
[plinketths@hpc1 ~]$ ls -l data.txt
-rw-r--r--. 1 plinketths plinketths 24 Apr 18 08:11 data.txt
[plinketths@hpc1 ~]$ chmod o-r data.txt
[plinketths@hpc1 ~]$ ls -l data.txt
-rw-r-----. 1 plinketths plinketths 24 Apr 18 08:11 data.txt
[plinketths@hpc1 ~]$Note the r is now removed from the others column.
Permissions can also be represented in octal format. Each permission has a value assigned to it:
- r (read) 4
- w (write) 2
- x (execute) 1
Permission can be read and set by adding up each number for each permission for data.txt:
- owner has
rw-or 6 - group has 'r--' or 4
- others have
---or 0
So the permissions for this file in octal is 640, each number represents a set of permissions in order for owner, group and others.
chmod can take these octal values as well:
[plinketths@hpc1 ~]$ chmod 755 hello_world.bsh
A final note the other_data file is actually directory, this is noted by the d at the beginning of the permissions column:
[plinketths@hpc1 ~]$ ls -ld other_data/
drwxr-xr-x. 2 plinketths plinketths 10 Apr 18 08:13 other_data/
To set permission for all files inside a directory use the -R option for chmod.
Getting Help
This document is not intended to be comprehensive, merely just to give you a big enough shovel to dig your own hole with. Linux has a few built in help features such as the manual pages. These can be brought up with the man command. For example man ls brings up this page:
LS(1) User Commands LS(1)
NAME
ls - list directory contents
SYNOPSIS
ls [OPTION]... [FILE]...
DESCRIPTION
List information about the FILEs (the current directory by default). Sort entries alphabetically if none
of -cftuvSUX nor --sort is specified.
Mandatory arguments to long options are mandatory for short options too.
-a, --all
do not ignore entries starting with .
-A, --almost-all
do not list implied . and ..
--author
with -l, print the author of each file
-b, --escape
print C-style escapes for nongraphic characters
--block-size=SIZE
with -l, scale sizes by SIZE when printing them; e.g., '--block-size=M'; see SIZE format below
-B, --ignore-backups
do not list implied entries ending with ~
-c with -lt: sort by, and show, ctime (time of last modification of file status information); with -l:
show ctime and sort by name; otherwise: sort by ctime, newest first
...
If you want to fix problems like a real Information Technology professional it's often useful to just put the error into a search engine. Many problems have been fixed by copy and pasting from StackOverflow. Sometimes common problems can be easily rooted out that way.
Finally, if it's not something you can find in the manual pages and searching isn't yielding results you can always open a support ticket with Research Computing. Please do not hesitate to do so as we'd rather solve your issue than have you sit there and spin your wheels for hours or days.
Logging in with SSH
The ASU cluster uses Slurm for scheduling and queuing access to the limited resources of the cluster, mainly CPU and RAM. In order to schedule jobs on the cluster one needs to request an account be created on the login node (hpc1.its.appstate.edu). This account will be simply be your ASU credentials.
There are two basic ways to interact with the login node over SSH. First is via the command line using the ssh and scp commands built into macOS, Linux, BSD and now Windows 10+ operating systems and the second is through the remote facilities Visual Studio Code.
Option 1: Visual Studio Code
- After installing VSCode install the Remote - SSH extension.
- The remote extension will appear in the left hand activity bar, it looks like a computer monitors with two arrows:


- Click that icon and then under the Remote Tunnels drop down right click on SSH.
- From that menu select New Remote.
- After selecting New Remote a prompt will show up in the command box asking for an address, here simply type in
ssh <your_user_name@hpc1.its.appstate.edu>:

- You will be prompted for your password so enter it, then it will ask which ssh configuration to update: take the default here.
- Now it will prompt you to connect (bottom right corner), connect and VSCode will open a new window prompting you for your password.
- After some initial setup you can click the Explorer button (looks like two sheets of paper, upper left of the screen in the activity bar) and browse the file system on the remote host.
- Click the Open Folder button and in the top command box select the folder called data:


- After opening the data directory you can simply drag and drop files over in the explorer pane, right click on a file to get options for downloading, editing and deleting.
That completes initial setup of the SSH connection.
Option 2: Command line SSH client
The instructions here are less hand holding since the assumption is you're more well versed with basic Linux and Unix type environments.
- Open your terminal of choice.
ssh username@hpc1.its.appstate.eduwith your ASU ID and password.- Once in
cd ~/dataand edit/upload files there. - The usual text editors and *nix utilites are here. Use
vimornanoto edit your Slurm jobs, evenemacs. scpcan be used to move files back and forth.
Scheduling your first Slurm Job

Please utilize the diagram below to help you understand the layout and terminologies used here. HPC1 is our login node and is the primary machine you'll be using, HPC2 and HPC3 are compute only nodes and do not host any files or storage. You will need to use ASU's AnyConnect VPN to login to HPC1 remotely.

There are a few basic commands you'll be using to submit, track and cancel jobs:
- sbatch
- squeue
- scancel
- sinfo
sbatch is the primary way you can a task, for example:
sbatch -N1 -n1 --mem-per-cpu=100MB -t00:05:00 hello_world.bsh
Where -N1 tells sbatch to run on one node, -n1 specifies one CPU per node, --mem-per-cpu requests 100MB of RAM for each CPU requested and -t requests a specific amount of wall time. The hellow_world.bsh script is a simple script that just requests the hostnmae of the node it was run on:
#!/bin/bash
echo "Hello from $(hostname)"
Once the sbatch is submitted you'll be issued a job number:
Submitted batch job 53
You can use this number to check on the status with the scontrol command:
scontrol show job 53
JobId=53 JobName=hello_world.bsh
UserId=lh59281(1002) GroupId=lh59281(1002) MCS_label=N/A
Priority=4294901755 Nice=0 Account=(null) QOS=(null)
JobState=COMPLETED Reason=None Dependency=(null)
Requeue=1 Restarts=0 BatchFlag=1 Reboot=0 ExitCode=0:0
RunTime=00:00:00 TimeLimit=00:05:00 TimeMin=N/A
SubmitTime=2024-04-09T12:08:46 EligibleTime=2024-04-09T12:08:46
AccrueTime=2024-04-09T12:08:46
StartTime=2024-04-09T12:08:46 EndTime=2024-04-09T12:08:46 Deadline=N/A
SuspendTime=None SecsPreSuspend=0 LastSchedEval=2024-04-09T12:08:46 Scheduler=Backfill
Partition=compute AllocNode:Sid=localhost:872330
ReqNodeList=(null) ExcNodeList=(null)
NodeList=hpc3
BatchHost=hpc3
NumNodes=1 NumCPUs=128 NumTasks=1 CPUs/Task=1 ReqB:S:C:T=0:0:*:*
TRES=cpu=128,node=1,billing=128
Socks/Node=* NtasksPerN:B:S:C=0:0:*:* CoreSpec=*
MinCPUsNode=1 MinMemoryCPU=100M MinTmpDiskNode=0
Features=(null) DelayBoot=00:00:00
OverSubscribe=NO Contiguous=0 Licenses=(null) Network=(null)
Command=/hpc/lh59281/hello_world.bsh
WorkDir=/hpc/lh59281
StdErr=/hpc/lh59281/slurm-53.out
StdIn=/dev/null
StdOut=/hpc/lh59281/slurm-53.out
Power=
Since this demonstration job was relatively short and easy the job completes almost as fast as it was submitted. In this status you can see it's state is finished as well as where the node it ran on and the node it was started from, the BatchHost.
The results will be stored in the data directory in your home, the file name will be slurm-jobnumber.out So, in this example it is slurm-53.out with the following contents:
Hello from hpc3.its.appstate.edu
This tells us that the Slurm scheduler selected hpc3 to run the job (hpc2 was probably busy) from the hostname reported.
You can also put some Slrum specific comments in a script that will pass on to the sbatch command. Please note that command line arguments will supersede any options set in the script. Example:
#!/bin/bash
#SBATCH -N1 -n1 --mem-per-cpu=100MB -t00:05:00
echo "Hello from $(hostname)"
The first line is just like any other shell script, it tells the OS which interpreter to run the script with. This could just as easily be #!/bin/sh.
The next comment has the same options that were in the command line the last time, to run this version simply issue the following command:
sbatch hello_world.bsh
As before the results will be dropped in a file in your data directory. Both of these ways are completely valid.
HPC Cluster Description
App State HPC
AppState HPC is an educational and research cluster with 2 compute nodes for a total of 128 cores and 2TB RAM. The storage controller provides 20TB of active storage for students and researchers. A high-throughput, low-latency Infiniband network is available for optimal performance in file storage and message-passing between processes on multiple nodes. The cluster uses Slurm Workload Manager for job scheduling.
Per-compute-node specifications, compute partition:
- 64 Cores / 128 Threads: 2x AMD EPYC 7543 2.8GHz (turbo 3.7GHz) 32-core Processors
- 1TB RAM: 16x DDR4 3200MHz 64GB Samsung DIMM
- 16GB per core
- 10Gbit/s Ethernet: BCM57412 NetXTreme-E
- Infiniband: Mellanox MT28908 ConnextX-6
Controller node specifications:
- 12TB Long-term Storage (12x 2TB SSD in RAID 10)
- 3.2TB Active Storage (1x NVME SSD over Infiniband)
Debug nodes we have two older, lesser nodes for use in classroom and testing.
hpcd1:
- 16 Cores / 32 Threads: Intel(R) Xeon(R) CPU E5-2650 v2 @ 2.60GHz
- 256GB DDR3
- 1Gbps Ethernet connection
hcpd2:
- 16 Cores / 32 Threads: Intel(R) Xeon(R) CPU E5-2650 v2 @ 2.60GHz
- 256GB DDR3
- 1Gbps Ethernet connection
lscpu capabilities statement for AMD EPYC 7543: lm fpu fpu_exception wp vme de pse tsc msr pae mce cx8 apic sep mtrr pge mca cmov pat pse36 clflush mmx fxsr sse sse2 ht syscall nx mmxext fxsr_opt pdpe1gb rdtscp x86-64 constant_tsc rep_good nopl nonstop_tsc cpuid extd_apicid aperfmperf rapl pni pclmulqdq monitor ssse3 fma cx16 pcid sse4_1 sse4_2 movbe popcnt aes xsave avx f16c rdrand lahf_lm cmp_legacy svm extapic cr8_legacy abm sse4a misalignsse 3dnowprefetch osvw ibs skinit wdt tce topoext perfctr_core perfctr_nb bpext perfctr_llc mwaitx cpb cat_l3 cdp_l3 invpcid_single hw_pstate ssbd mba ibrs ibpb stibp vmmcall fsgsbase bmi1 avx2 smep bmi2 erms invpcid cqm rdt_a rdseed adx smap clflushopt clwb sha_ni xsaveopt xsavec xgetbv1 xsaves cqm_llc cqm_occup_llc cqm_mbm_total cqm_mbm_local clzero irperf xsaveerptr rdpru wbnoinvd amd_ppin brs arat npt lbrv svm_lock nrip_save tsc_scale vmcb_clean flushbyasid decodeassists pausefilter pfthreshold v_vmsave_vmload vgif v_spec_ctrl umip pku ospke vaes vpclmulqdq rdpid overflow_recov succor smca fsrm cpufreq
A Note on Storage
The storage available on the HPC is for active research data only and space is limited. We enforce quotas per account that can be grown, but rely on you to remove data from the HPC after you are done with it. Systems and Research Computing staff will reach out periodically about removing data that is no longer involved in active research. If your dataset is too large to allow others to also utilize the HPC system, we may have to discuss alternative compute opportunities.
Long-term data storage is available for $7/TB/mo through ITS and is the only approved mechanism for long-term storage of App State research data. Please contact us to set up your long-term storage account.
HPC Tutorials
This is a youtube playlist that contains videos for beginners on how to use the HPC and some best practices! It covers different topics like:
- basic commands
- editing files
- running scripts
- submitting jobs through slurm
- and managing environments.
There is also a tutorial series here by MIT that offers some great content for introductions to computing with the command line. The 2026 course is currently under construction, but the 2020 materials are great regardless!
Example SLURM Script (from video)
(Link to original video)
fastqc.sh and multiqc.sh scripts at bottom of page
(slurm script)
#!/bin/bash
#SBATCH --job-name=qcjob
#SBATCH --output=%x_%j.out
#SBATCH --error=%x_%j.err
#SBATCH --account=<your_department>
#SBATCH --partition=compute
#SBATCH --nodes=1
#SBATCH --ntasks-per-node=1
#SBATCH --cpus-per-task=16
#SBATCH --mem=100GB
#SBATCH --time=01:00:00
#SBATCH --mail-type=END,FAIL
#SBATCH --mail-user=<your_email@appstate.edu>
echo 'Running on host: ' `hostname`
echo 'Starting Time: ' `date`
echo 'Job ID: ' $SLURM_JOB_ID
echo 'Node list: ' $SLURM_JOB_NODELIST
echo 'Task ID: ' $SLURM_ARRAY_TASK_ID
# Your executable or script here
# ./your_program_to_run_here
scripts_dir=/path/to/your/home/new_project/scripts
${scripts_dir}/fastqc.sh
${scripts_dir}/multiqc.sh
(fastqc.sh)
#!/bin/bash
module load user/all/azeez
reads="/path/to/your/home/new_project/reads/*.fq.gz"
output_dir="/path/to/your/home/new_project/fastqc_results"
fastqc ${reads} -o ${output_dir}
(multiqc.sh)
#!/bin/bash
module load user/all/azeez
fastqc_results="/path/to/your/home/new_project/fastqc_results"
output_dir="/path/to/your/home/new_project/multiqc_results"
multiqc ${fastqc_results} -o ${output_dir}
Data transfer onto the HPC
At some point, you will inevitably need to get data from the HPC back onto your local machine, or vice versa. There are a number of different tools that can handle this, but for most use cases either rsync or scp should suffice.
Transfer using GUI application
If you would like to use a graphical user interface application, CyberDuck is one such option. After you have downloaded and opened the application, you will be met with a screen like this:

To connect to your home directory on the HPC, click on 'Open Connection', then select SFTP from the dropdown. Enter in the address of the HPC in the Server section, your username and password, as well as the SSH private key used to connect to the HPC if you have one (not shown in this example).

After hitting connect (click 'Allow' on the Unkown fingerprint popup), you will see the directory structure of the folders on the HPC in your home directory.

To download a file or directory simply right click it and hit download

And to upload a file you click the 'Upload' button in the top right and browse your local files to upload

Transfer using command line
Rsync is the most recommended:
- Efficient for large or incremental transfers.
- Automatically skips files that haven't changed.
- Can resume interrupted transfers.
To copy files to the HPC:
eg. A text file called error.txt
(base) azeezoe@BBMP814:~$ rsync -avhP error.txt azeezoe@hpc1.its.appstate.edu:/hpc/faculty/azeezoe/error.txt
azeezoe@hpc1.its.appstate.edu's password:
sending incremental file list
error.txt
786 100% 0.00kB/s 0:00:00 (xfr#1, to-chk=0/1)
sent 900 bytes received 35 bytes 143.85 bytes/sec
total size is 786 speedup is 0.84
-a = archive (preserves permissions, etc.)
-v = verbose
-h = human-readable
-P = progress + resume
eg. To copy a folder (called test_transfer) from the HPC to your local computer
[azeezoe@hpc1 ~]$ ls test_transfer/
test_data.txt
Transfer it across from your local computer
(base) azeezoe@BBMP814:~$ rsync -avhP azeezoe@hpc1.its.appstate.edu:/hpc/faculty/azeezoe/test_transfer .
azeezoe@hpc1.its.appstate.edu's password:
receiving incremental file list
test_transfer/
test_transfer/test_data.txt
0 100% 0.00kB/s 0:00:00 (xfr#1, to-chk=0/2)
sent 47 bytes received 156 bytes 45.11 bytes/sec
total size is 0 speedup is 0.00
We can see that both the folder and data are transferred across
(base) azeezoe@BBMP814:~$ ls test_transfer/
test_data.txt
Scp can still be appropriate, for quick, secure, one-time transfers. It's use is similar to rsync.
Transfer to HPC:
scp -r /path/to/local_data user@hpc.example.edu:/path/to/remote_folder/
Transfer from HPC:
scp -r user@hpc.example.edu:/path/to/remote_data /path/to/local_folder/
-r = recursive (needed for copying directories)
Issues Connecting to the HPC
Connection troubleshooting
If you are trying to connect to the HPC (ssh <your_username>@hpc1.its.appstate.edu) but are finding that the SSH client is hanging or getting a message that the 'login has timed out', there are a few troubleshooting steps you can go through to try and resolve the issue.
On campus connections
If you are connecting from on campus, first make sure you are connected to either the asu-secure or asu wifi networks.
If the SSH client is still failing despite this, try connecting to the asu-visitor network and then connect to the VPN (see "Home connections" below).
Remote connections (VPN)
If you are connecting from off-campus or from home, you must use the VPN client to connect after being connected to your home or other public WIFI network.
To connect to App State VPN, please see official documentation for:
Still having issues...
Double check that the syntax of your SSH command is correct, and that you are entering your password correctly.
If you are still having issues, you can put a ticket here or call the Help Desk at 828-262-6266
Patching and Pausing Jobs
On HPC1 use squeue to determine what jobs are running on what nodes:
squeue --long
Tue May 27 13:16:59 2025
JOBID PARTITION NAME USER STATE TIME TIME_LIMI NODES NODELIST(REASON)
8957 compute a1748355 azeezoe PENDING 0:00 1-00:00:00 1 (Dependency)
8958 compute a1748355 azeezoe PENDING 0:00 20:00:00 1 (Dependency)
8955 compute a1748355 azeezoe RUNNING 1:25:26 7-00:00:00 1 hpc2
8956 compute a1748355 azeezoe RUNNING 1:26:41 7-00:00:00 1 hpc2
Take note of what's running where, in this example let's say hpc2 is about to undergo schedule maintenance. Simply pause the jobs running on it:
scontrol suspend 8955,8956
Once it's back online, resume the jobs:
scontrol resume 8955,8956
Accessing the HPC via Open OnDemand
Our HPC cluster has a web interface available at ondemand.appstate.edu to anyone with an account on the cluster. This provides a more user friendly experience for people who are perhaps not comfortable with a Linux command line environment. Open OnDemand also allows for access to the HPC cluster without needing to use the VPN.
For video guides see our youtube page https://www.youtube.com/watch?v=iphB711n2hU&ab_channel=ASUResearchComputing
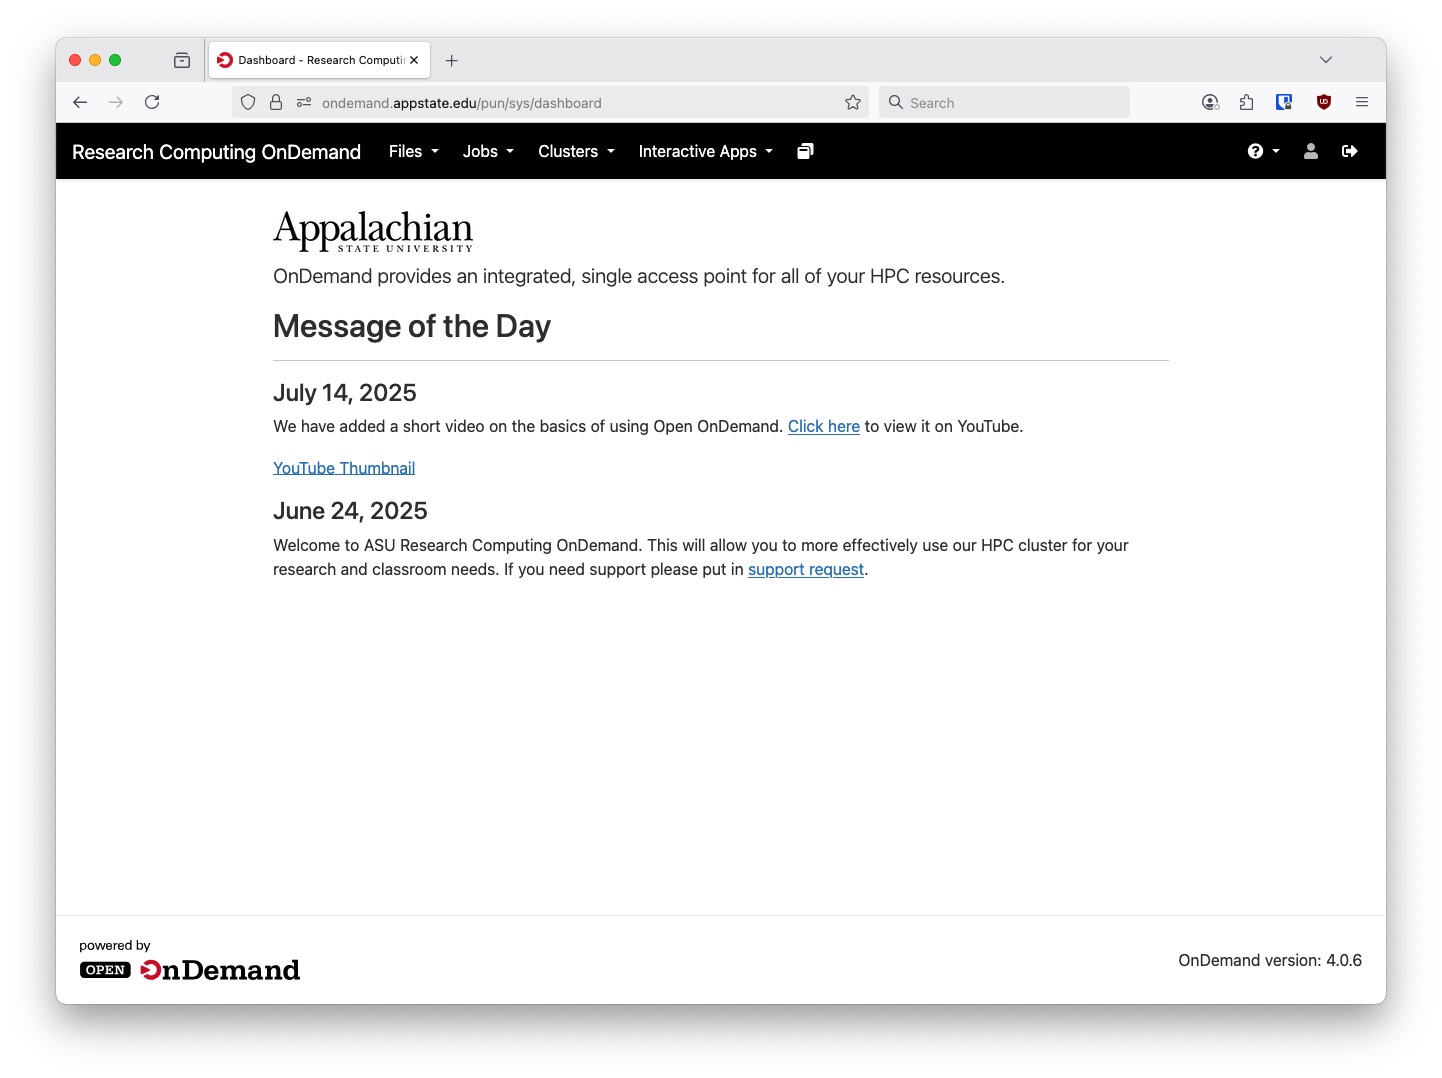
Upon first login there is the Message of the Day where the HPC admin team will be posting updates about patching, reboots, maintenance and new features.
From here there are a few options available. We have a status application underneath the Jobs menu to show a high level view of cluster utilization and available resources:
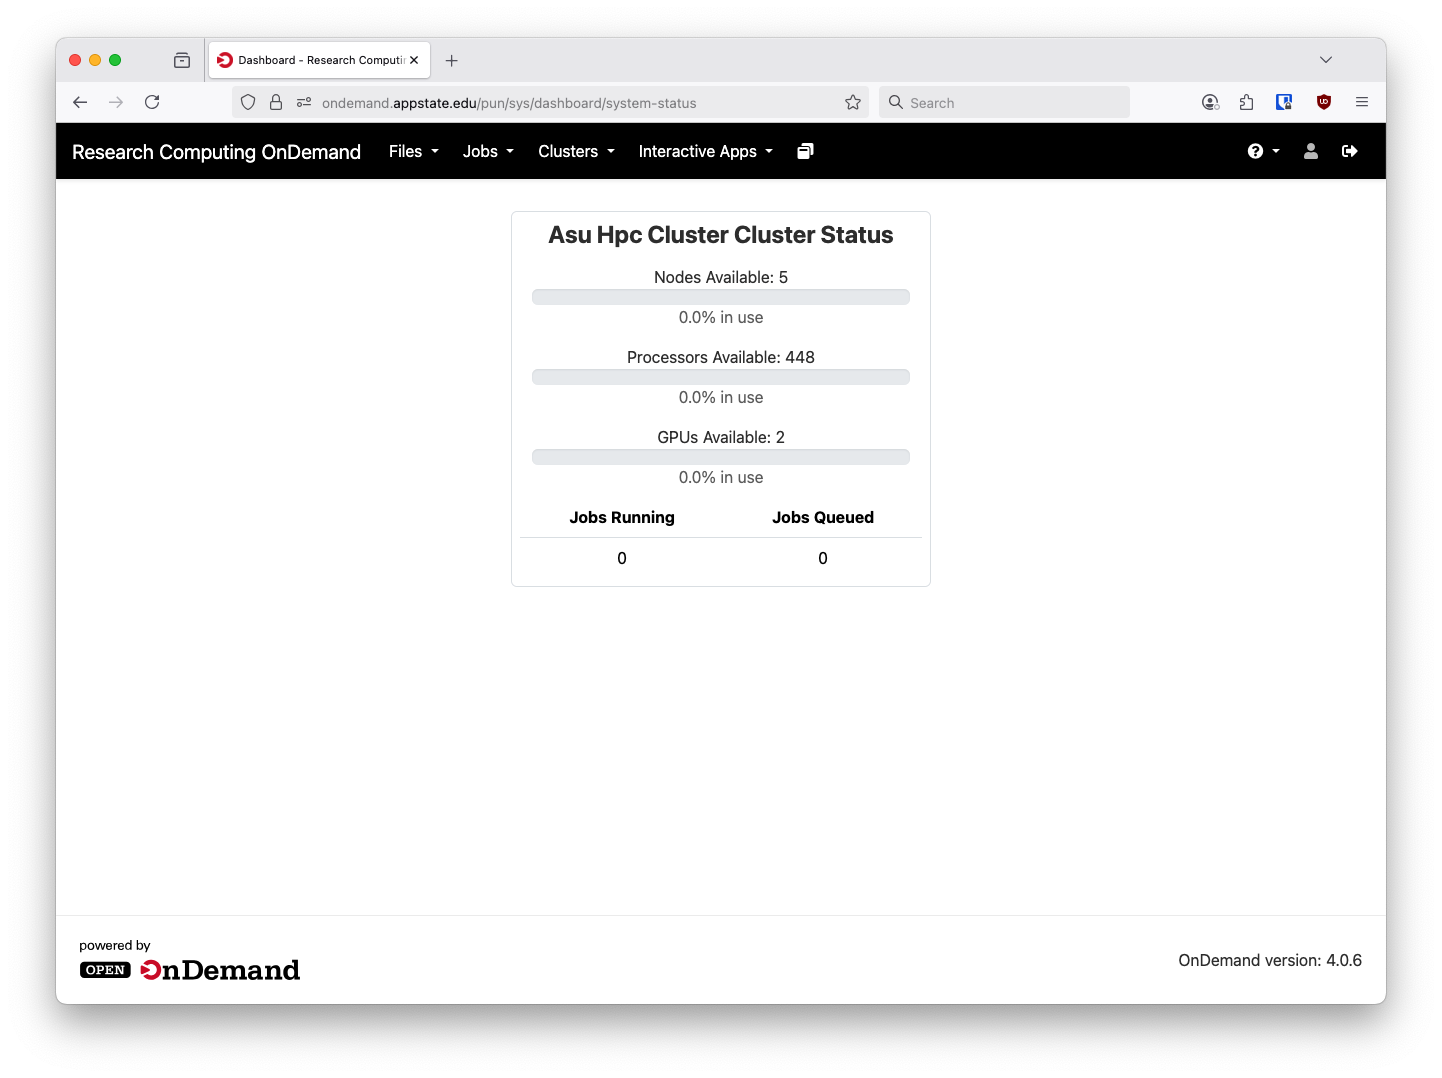
Please note the GPUs are only available for Computer Science users.
Above the System Status application in the Jobs menu there is an Active Jobs pane that will show your currently running and pending jobs:
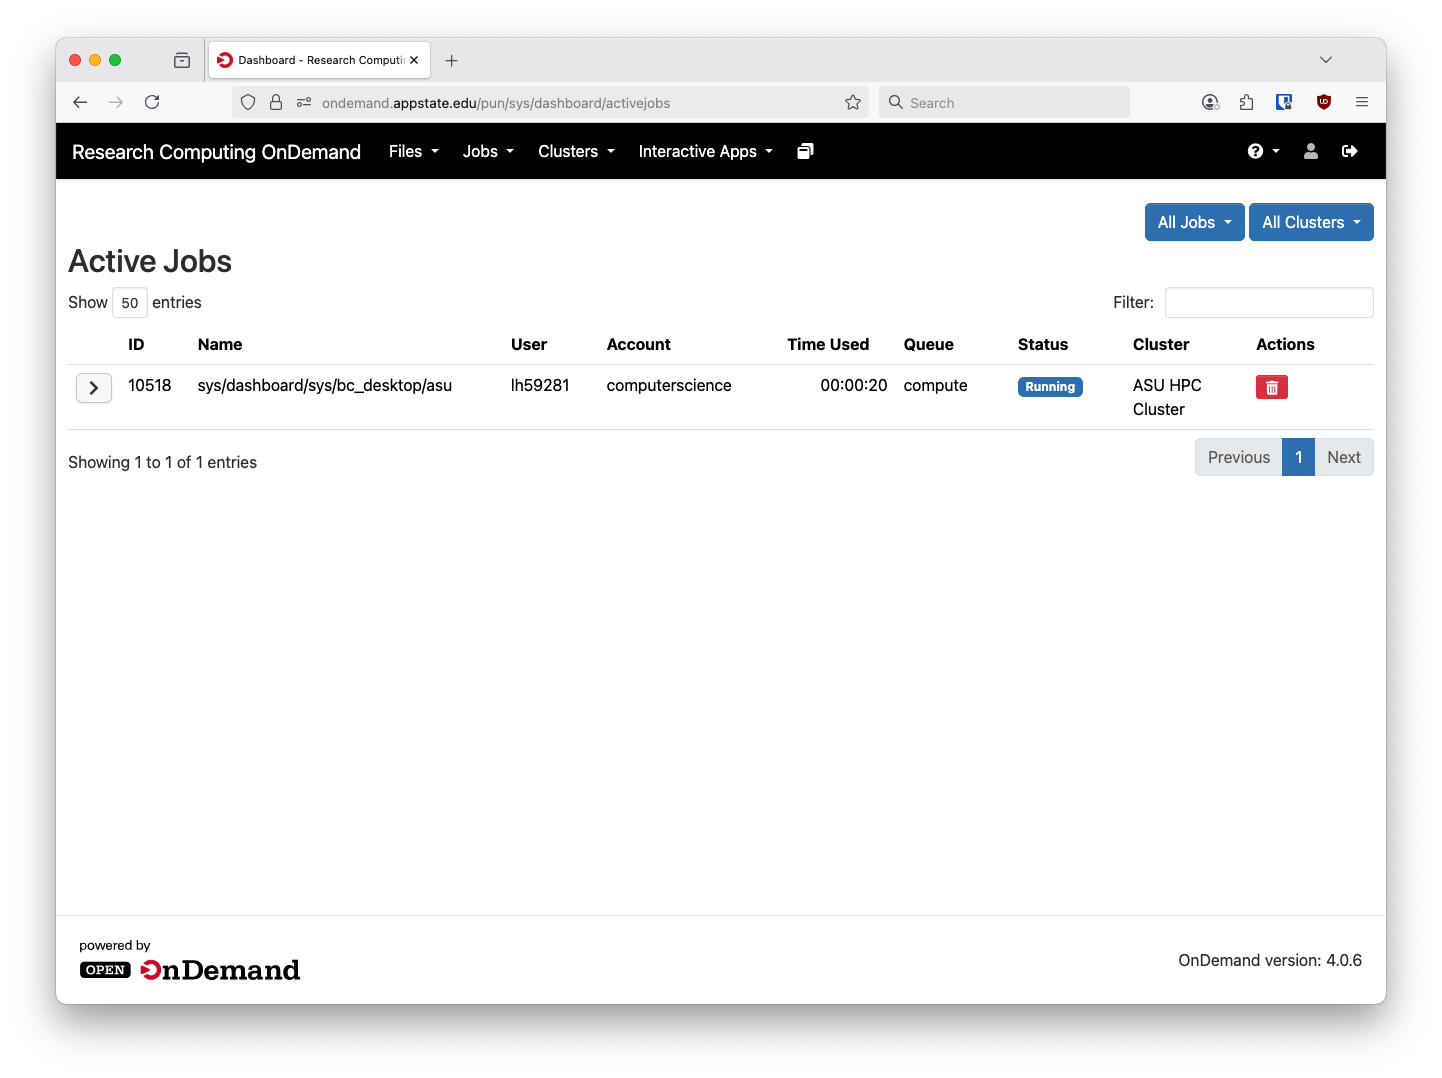
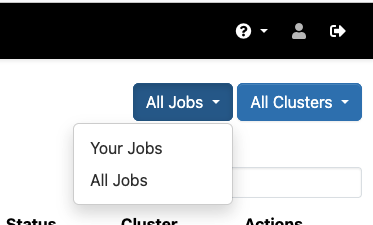
In the upper right hand corner you can also change Your Jobs to All Jobs and see all running jobs on the cluster:
Managing your files and using the web Bash Shell in OpenOnDemand
Our Research Computing HPC cluster now has file management and a bash shell available for users in a web browser via Open OnDemand.

This will allow you to manage, edit, upload and download data from the cluster. This is the same home directory that you will have if you SSH straight into hpc1.its.appstate.edu. Also the maximum size for a file upload is 10GB through Open OnDemand. Anything larger will need to uploaded via SCP or SFTP directly to hpc1.its.appstate.edu.
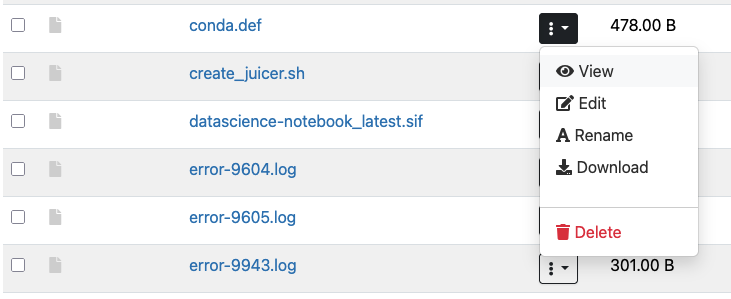
From this interface you can directly edit files. Simply click on the three vertical dots in the column next to the file name and select Edit:
The file will open in the web based text editor:
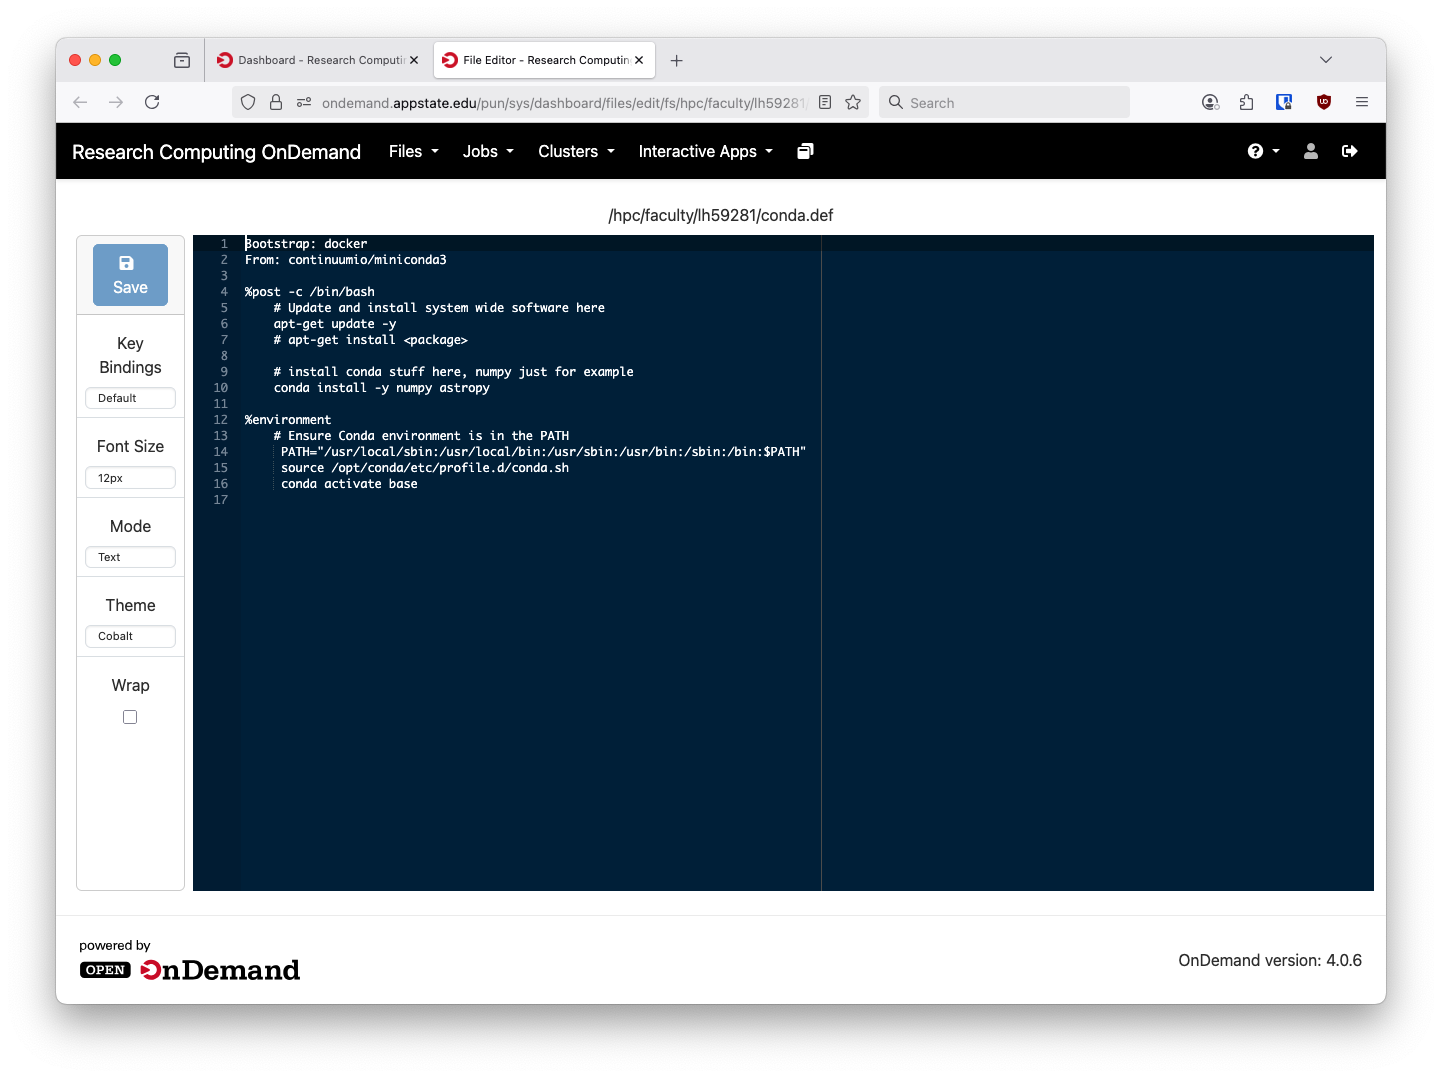
The editor has several themes, both light and dark, selectable on the left hand side.
Open OnDemand also has a web terminal available. It is acceesible via clicking the Open in Terminal option in the file manager or by going through the Clusters menu and selecting ASU HPC Shell Access.

Select ASU HPC Cluster Shell Access Here
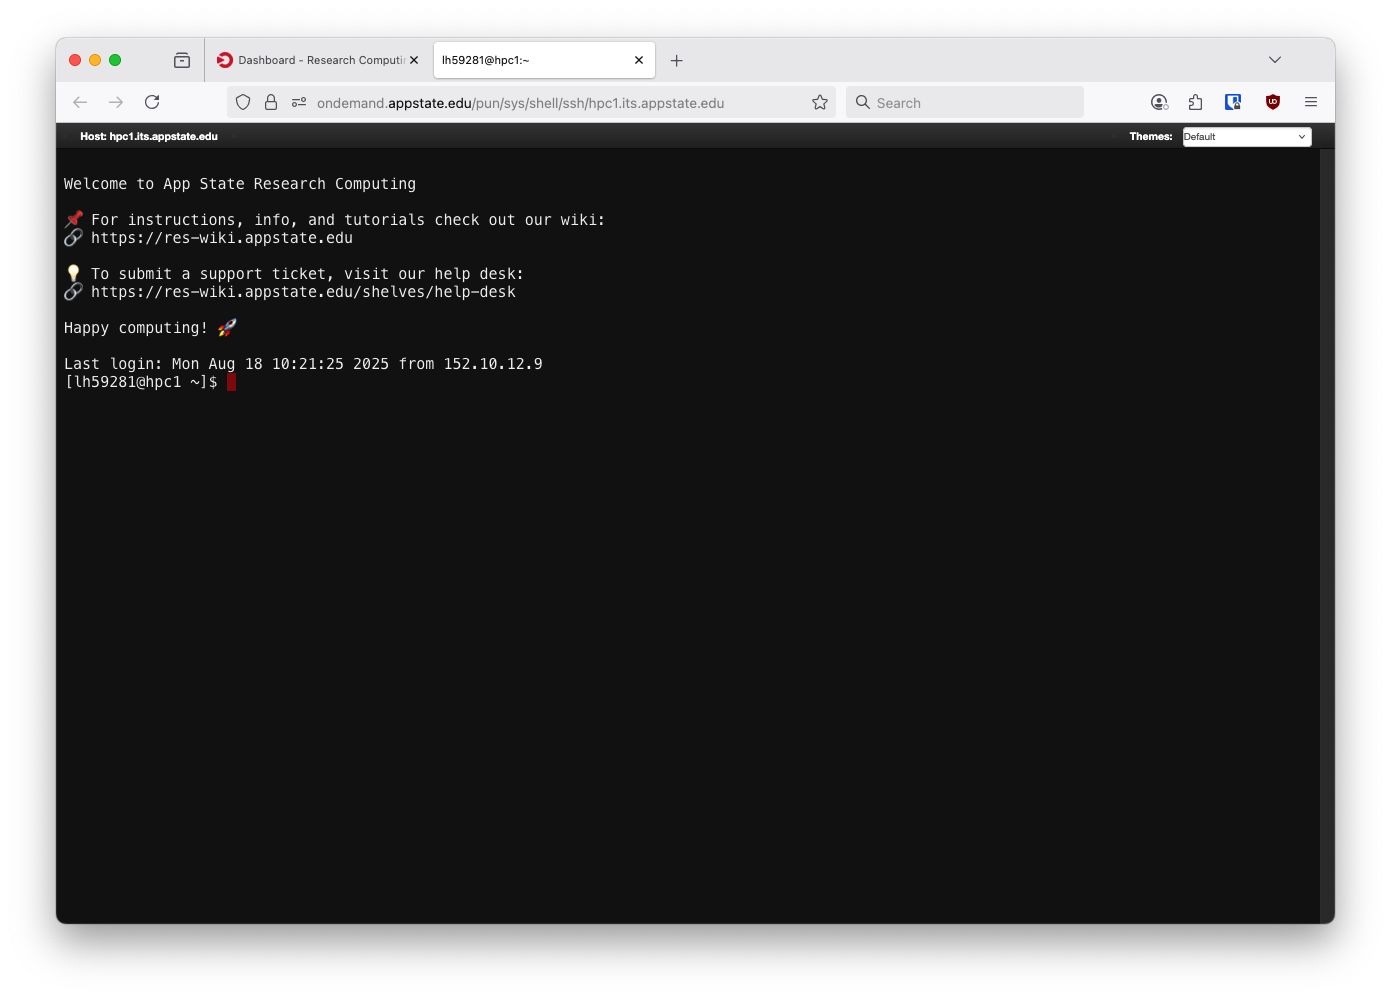
A regular bash shell
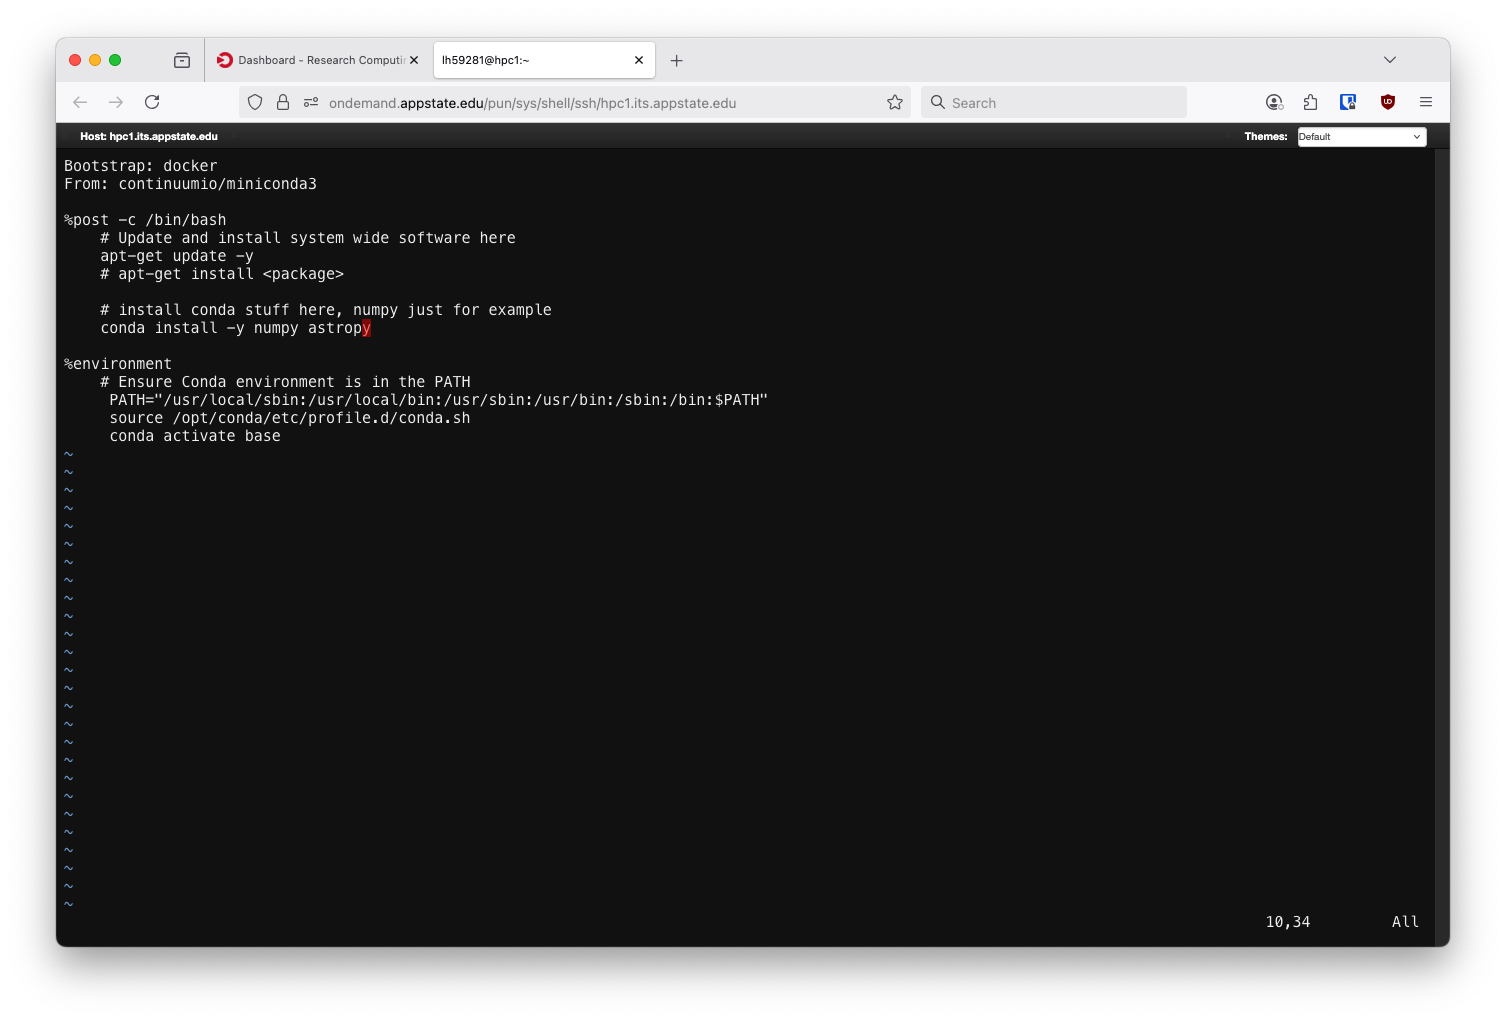
All the usual Linux CLI programs will work here, the same file from before but opened in the vim editor.
Here you will have a regular bash shell just like you do by using SSH to get into hpc1.its.appstate.edu. Any normal Linux CLI program will work here and you can submit Slurm jobs just as before. We will not be removing the ability to have direct shell access to hpc1.its.appstate.edu. This is simply another option. If you are doing some long term shell access or need to have a file open for longer than 20 minutes it is recommended to use regular SSH over Open OnDemand. For security posture reasons Open OnDemand terminals will close their connection after one hour or after twenty minutes of inactivity.
Virtual Desktops in Open OnDemand
Open OnDemand makes available two different virtual desktop options. These are accessible via the Interactive Apps menu:

The ASU Cluster Desktop is available for all HPC users, the Computer Science Desktop is a reserved instance for users in the Department of Computer Science. Non-Computer Science users do not have access to the CS partition.
After selecting the ASU Cluster Desktop option you will see this screen:
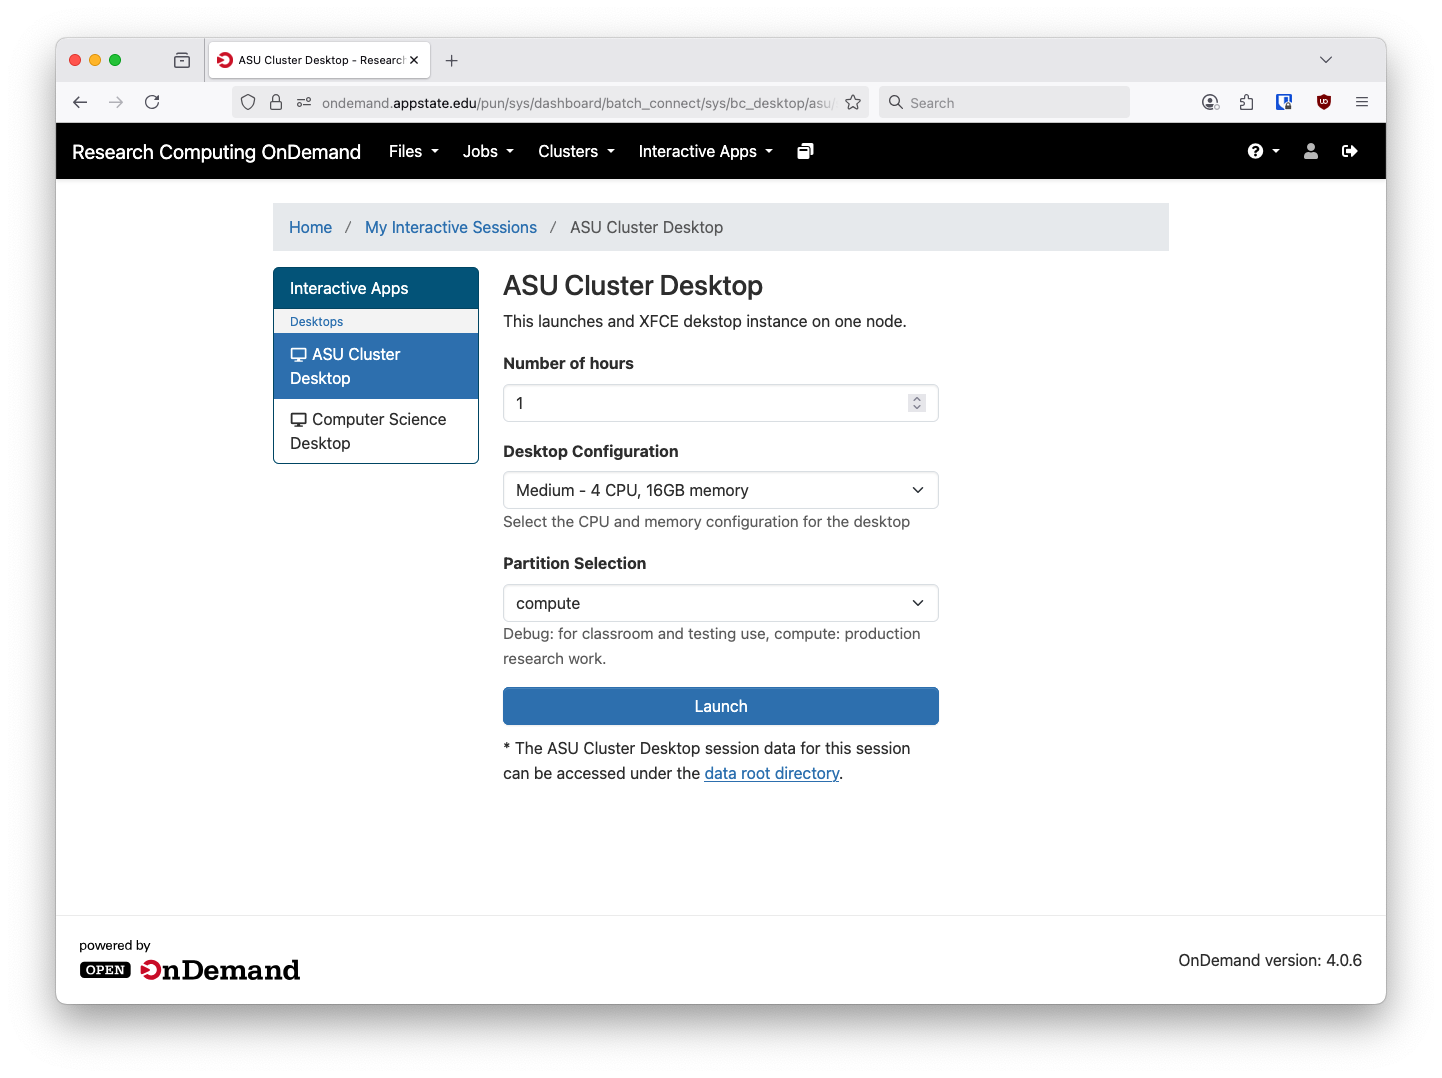
There are a few options here, first is the amount of time you want to reserve. The minimum is one hour and the maximum is 168 hours. If you close your web VNC session your job will keep running and you can reopen it at a later date. There are a few pre-defined sizes available:
| Name | CPU Cores | Memory (GB) |
|
Tiny |
2 | 4 |
|
Small |
4 | 8 |
| Medium | 4 | 16 |
| Large | 8 | 16 |
| X-Large | 16 | 32 |
| 2X-Large | 24 | 64 |
Keep in mind that anything you run inside this Virtual Desktop will also need to fit inside these RAM and CPU requirements. We may add more options in the future to better accommodate different workloads. The Tiny and Small options are mostly for the debug partition and classroom work. The debug nodes are older, slower, and smaller than their compute partition counterparts and we suggest sticking to Medium or smaller on those.
After launching the you'll be taken to the card for the Virtual Desktop. It will take a few minutes to get ready in most cases but after it has launched successfully you'll have a window like below:

Keep in mind that these Virtual Desktop connections work over noVNC and require a fair amount of bandwidth to operate. Most residential ISPs should be fine but if you're experiencing issues try to move closer to your WiFi router. Public places with busy, congested internet connections (such as a coffee shop first thing in the morning) might not allow for satisfactory results.
Clicking the Launch ASU Cluster Desktop will open the noVNC session in a new browser tab:

From here you can run any number of applications, including things like Jupyter Lab. If you run applications from the Virtual Desktop you do not need to sumbit it with a Slurm script. The Virtual Desktop is already running via Slurm. You can still load, unload Lmods and run any other program as you normally would on a desktop Linux computer.
Once your session is complete you can close the tab. You can also close the tab, log out, log back in and reopen it as long as you're with in the requested time limit. There is no needed to keep the window open during the duration of your task. It will keep running in the background.
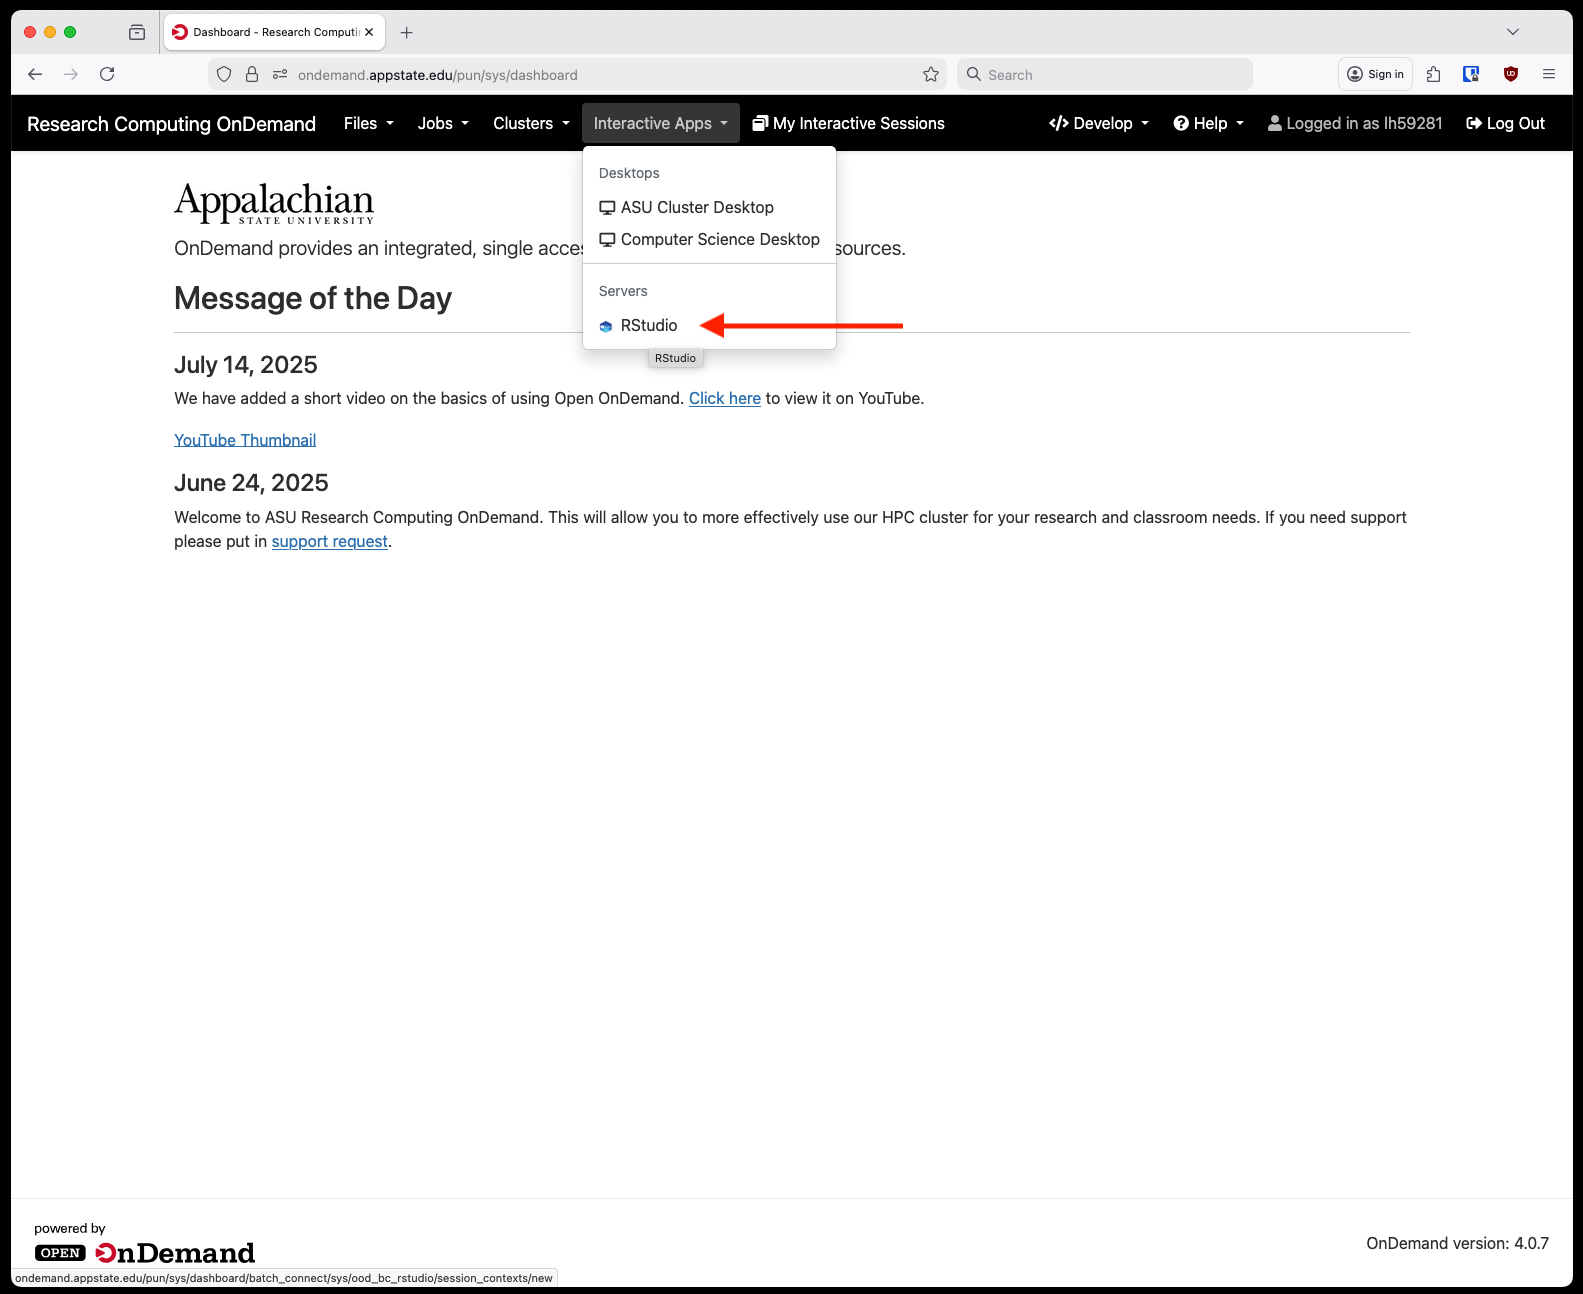
RStudio Open OnDemand Application
We now have RStudio available through Open OnDemand. It is accessed similarly to other interactive applications, first login to OnDemand and from the home screen select Rstudio from under Interactive Apps and Servers:
Next, fill out the information requested on the form page. There are a few pre-defined sizes for resource allocation, this will be the total amount of RAM and CPU available to your Rstudio session. An optional email filed is so you can receive an email when you session starts or closes. Partition choice should mostly be compute for faculty research.
Right now we only have one RStudio container available but as time progresses we will be keeping a small library of different versions or builds. If you need a customized container please reach out to the Research Computing team.

After you click Launch you'll be taken to a screen to wait for the session to start. This might take a minute give or take. After it is ready you will see a button appear that says "Connect to Rstudio Server."
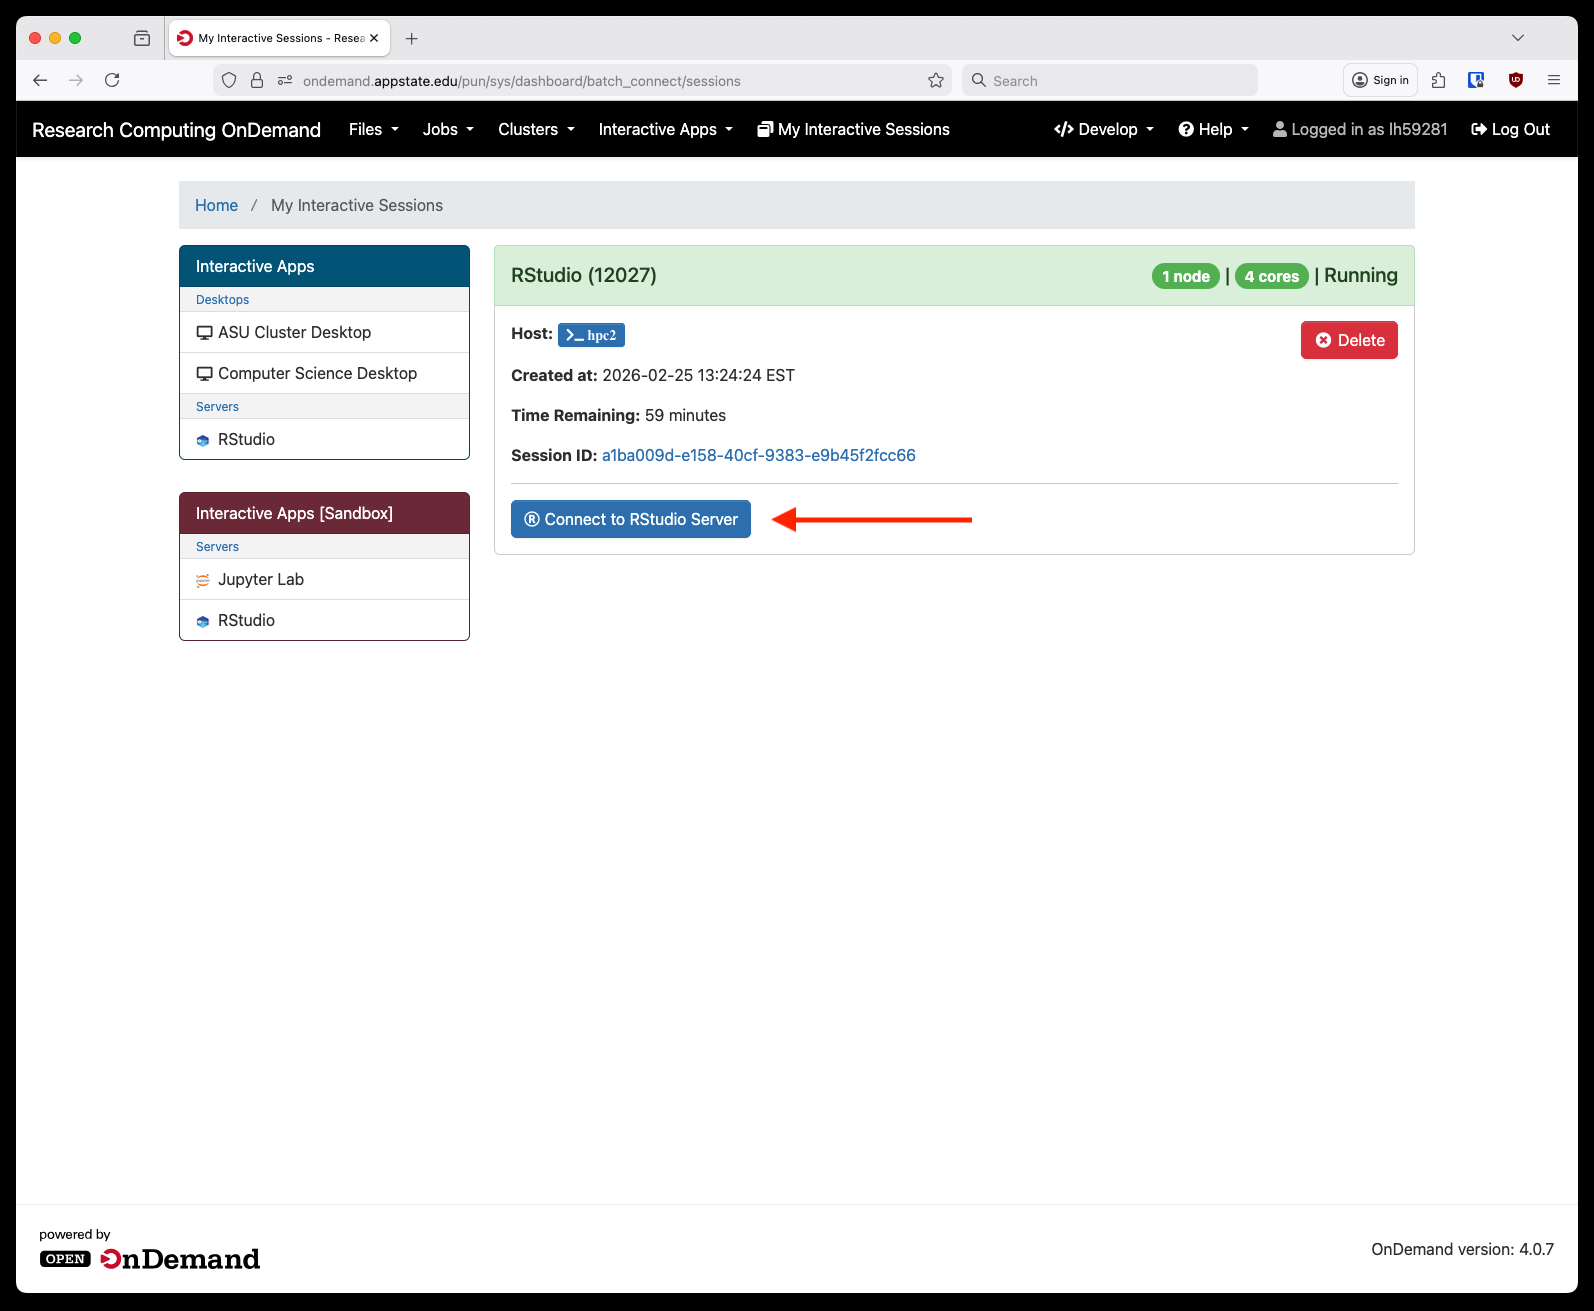
After clicking that a new tab will open with your RStudio session:
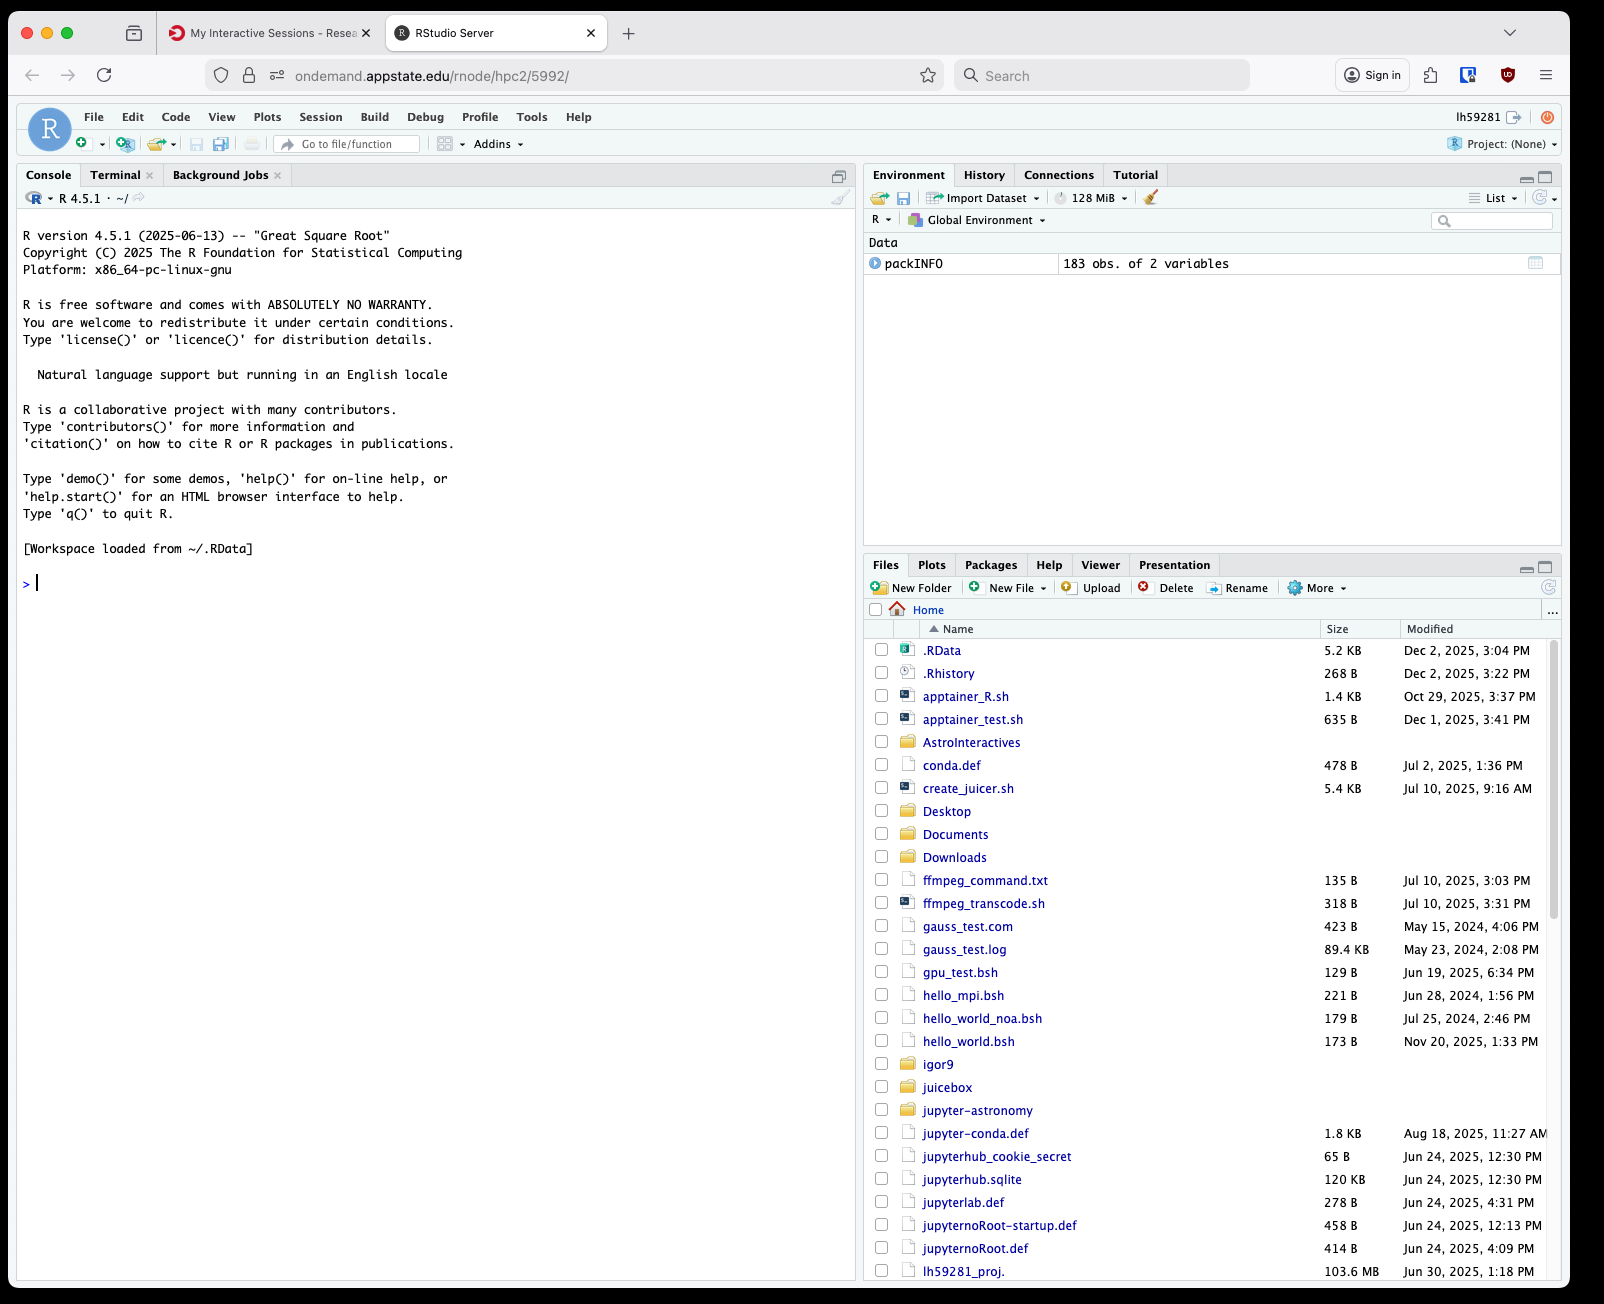
These containers are immutable so you'll need to install packages to your home directory through the R console as you go.
Jupyter Hub Open OnDemand Application
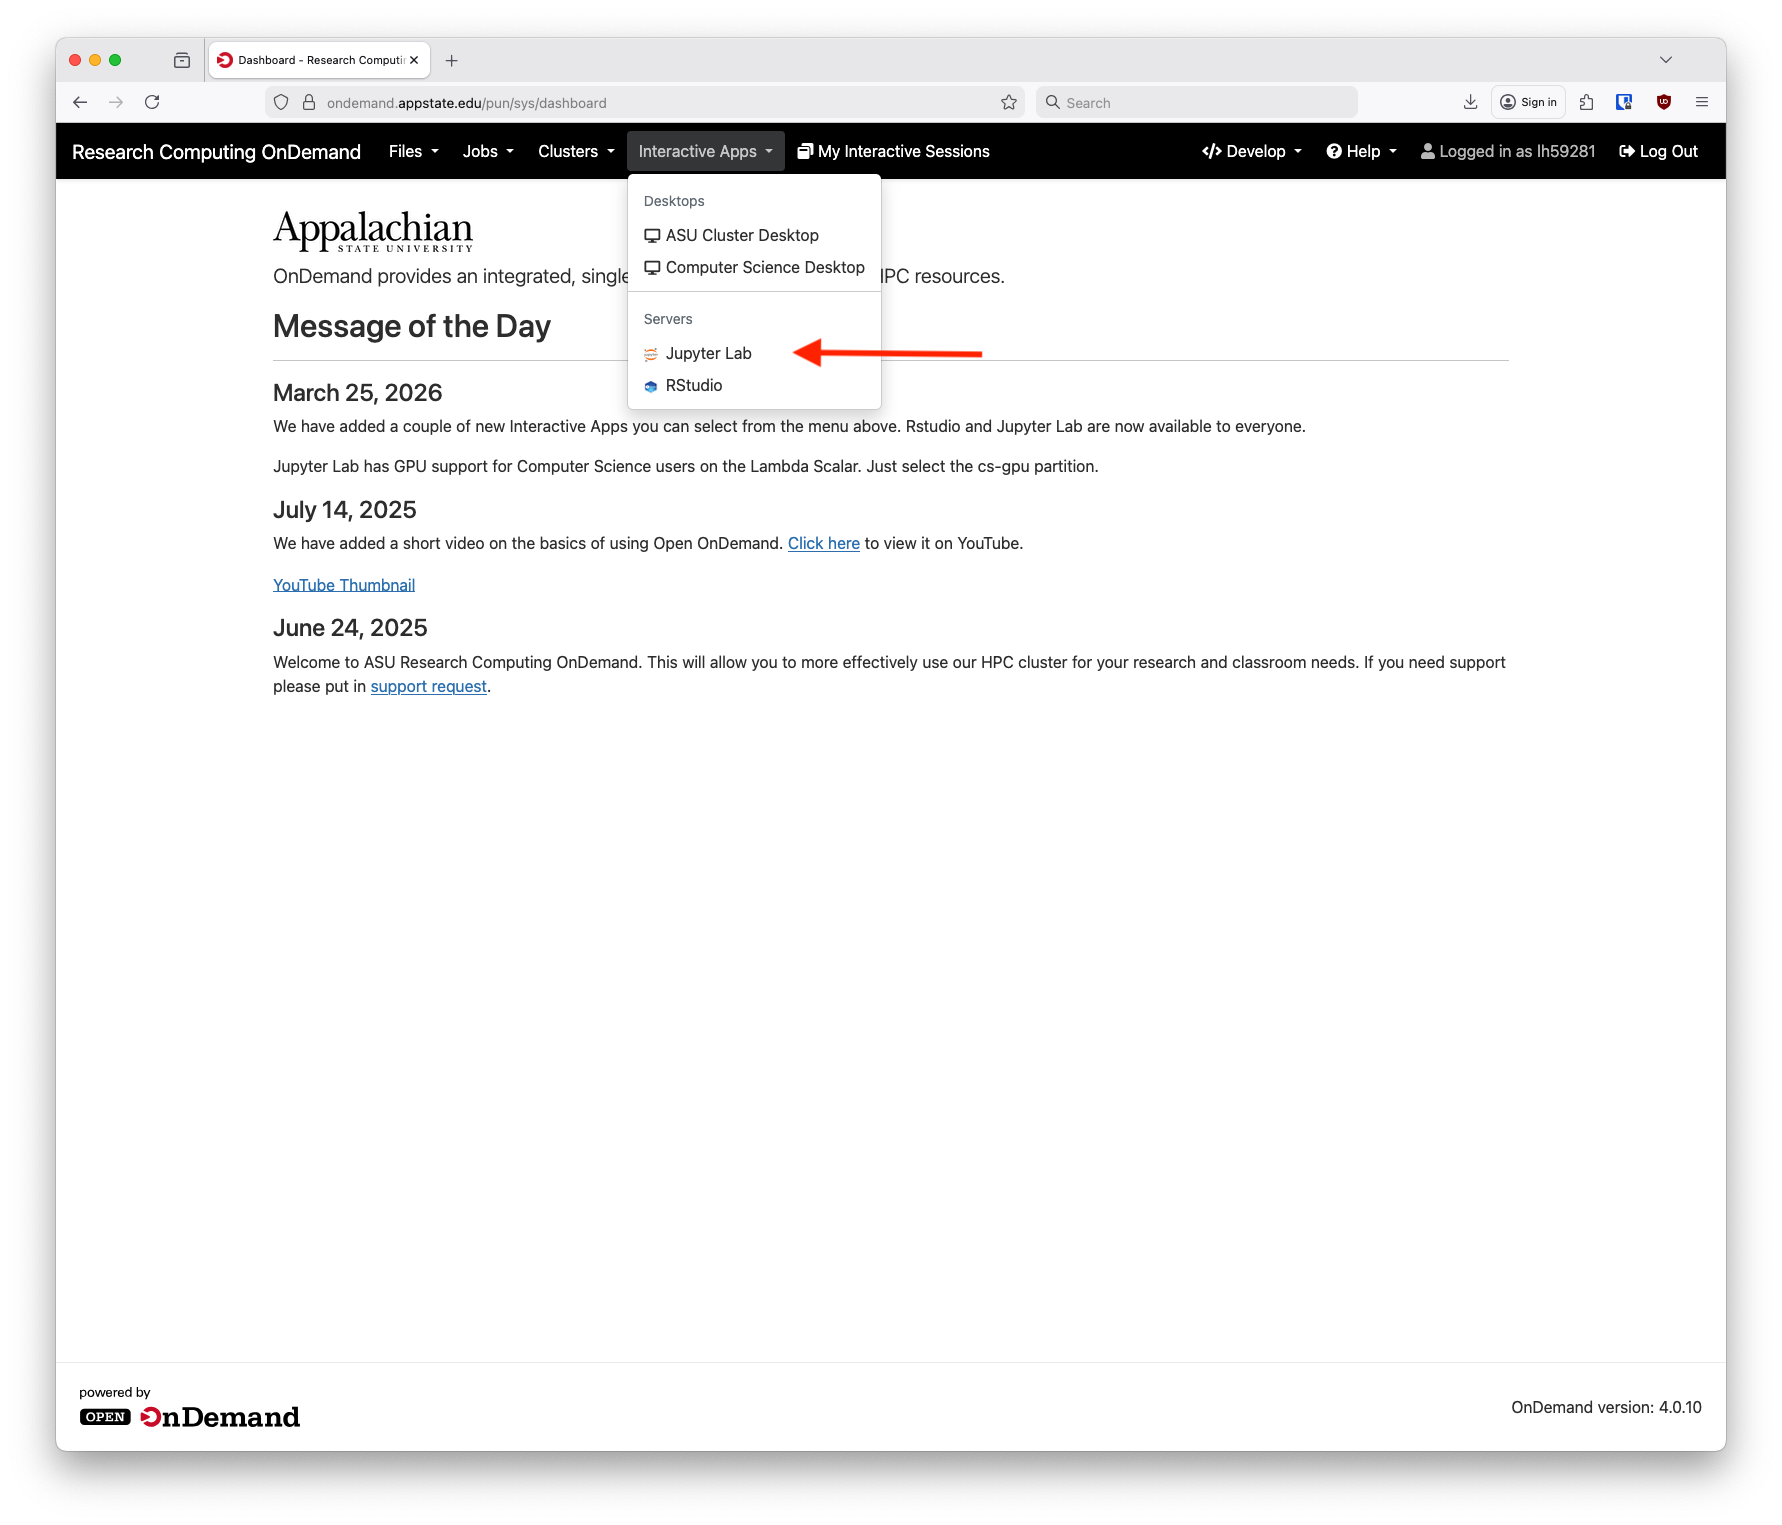
We now have Jupyter Lab available through Open OnDemand. It is accessed similarly to other interactive applications, first login to OnDemand and from the home screen select Jupyter Lab from under Interactive Apps and Servers:
Next, fill out the information requested on the form page. Select the time needed, CPUs and RAM for your session. An optional email filed is so you can receive an email when you session starts or closes. Partition choice should mostly be compute for faculty research, debug for testing and students and cs-gpu for Computer Science users with access to the GPU node. There's an optional field to use a custom Apptainer container if you have built one. It needs to be uploaded on the login node first either via SCP or through the Open OnDemand Files application. This is completely optional, leave this field blank to use our default Jupyter Hub image. Custom container images are a good way to build a Jupyter Hub environment for specific projects.

After you click Launch you'll be taken to a screen to wait for the session to start. This might take a minute give or take. After it is ready you will see a button appear that says "Connect to Jupyter."

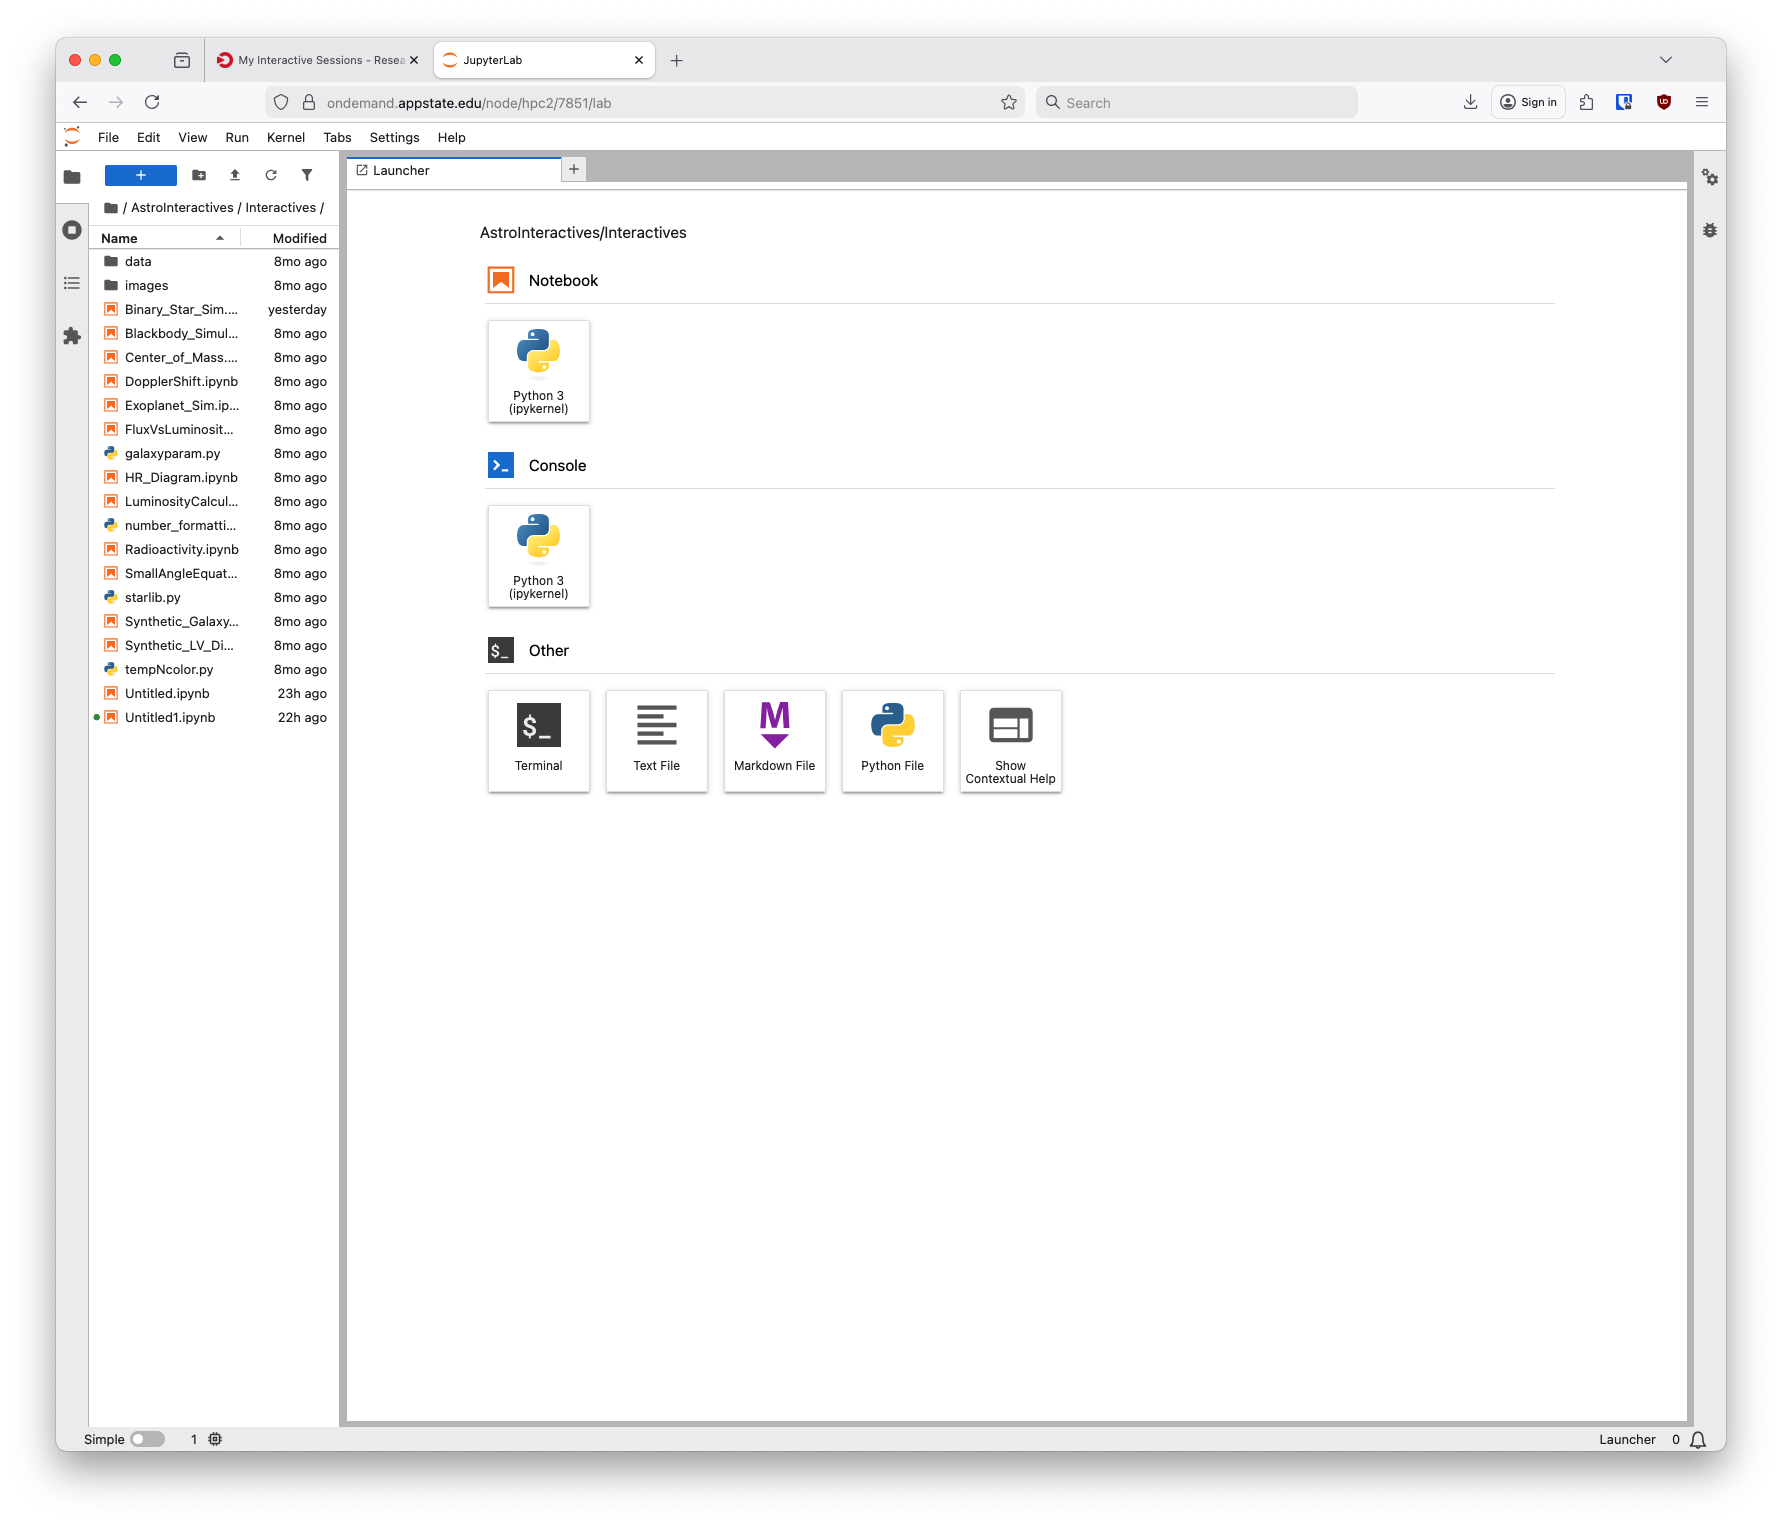
After clicking that a new tab will open with your Jupyter Hub session:
If you have further questions please submit a support request.