Environments on HPC
Information regarding how our software and package environments are handled on the HPC
- Jupyter Notebooks in Python Virtual Environments
- Building Conda environments in Apptainer
- Conda Environments
Jupyter Notebooks in Python Virtual Environments
Jupyter Notebook is a popular data science and analysis application written in Python. It is probably one of our most requested resources here at AppState Research Computing. We now have some self-service ways to run it on our compute nodes. Probably the quickest way is through Virtual Desktop application in Open On Demand. Please click that link and read the documentation on how to access those if you are not already familiar.
After you've requested and launched your Virtual Desktop on the cluster open up the terminal application in XFCE and create a Python virtual environment:
[lh59281@hpc2 ~]$ python -m venv jupyter-astronomy
[lh59281@hpc2 ~]$ source ./jupyter-astronomy/bin/activate
(jupyter-astronomy) [lh59281@hpc2 ~]$
You can name the virtual environment anything you like and in fact have multiple virtual environments for different Jupyter installs. This is very useful for different data analysis tasks. Next install Jupyter Lab with pip [ NOTE: it is inadvisable install things with pip outside of a virtual environment ]:
(jupyter-astronomy) [lh59281@hpc2 ~]$ pip install jupyterlabYou'll see a bunch of text fly past the screen and you may see a warning about pip being outdated. You can ignore that.
Next launch the application:
(jupyter-astronomy) [lh59281@hpc1 ~]$ jupyter labSome more text will stream by and a web browser will open with the Jupyter Lab interface:
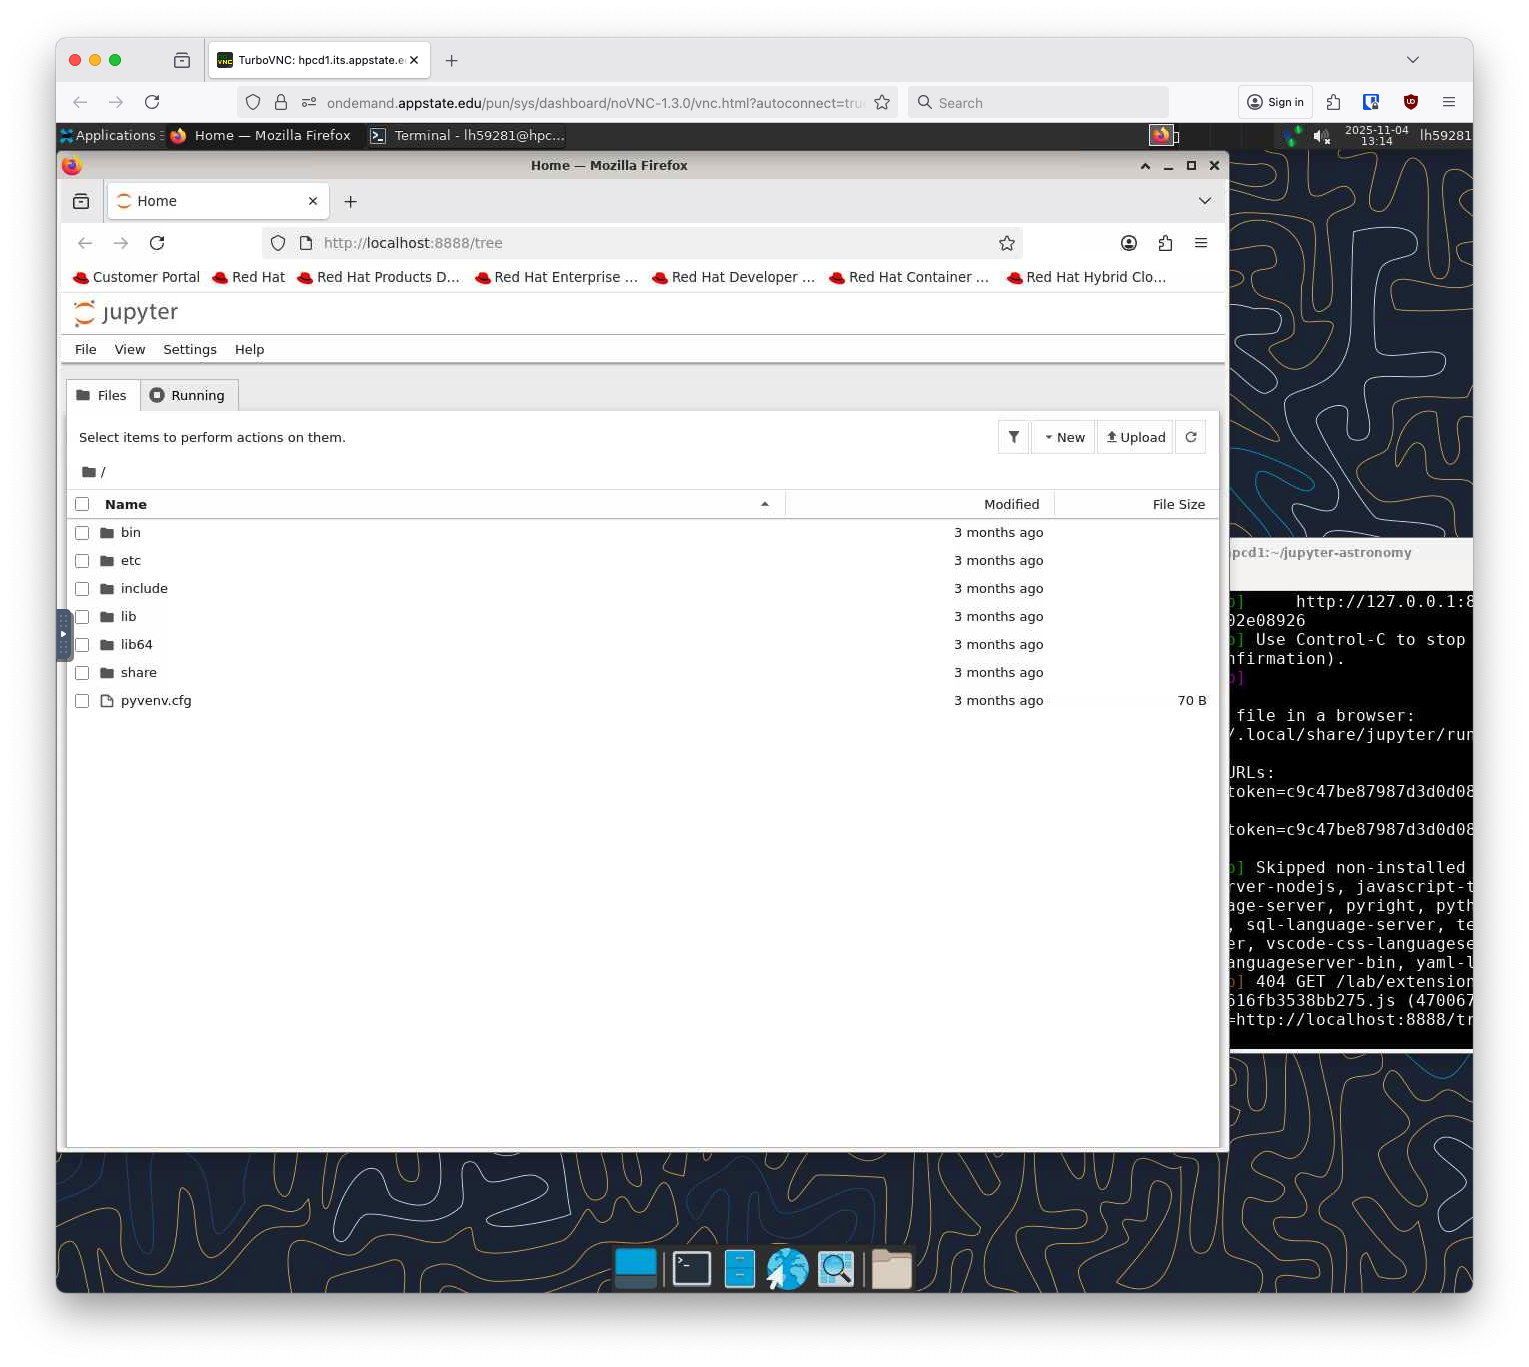
You can now load in Notebook files and run them as you would on your local desktop. You'll either need to upload them via Open OnDemand or SFTP before hand. Git clone from github also works just fine!
You can also install additional required pip packages in your virtual environment if needed. For example the example astronomy notebook requires numpy:
(jupyter-astronomy) [lh59281@hpc2 ~]$ pip install numpyIn addition to that you can load packages from a requirements.txt file if the code you're using ships one:
(jupyter-astronomy) [lh59281@hpc2 AstroInteractives]$ pip install -r requirements.txtWhen you are done with your Jupyter Notebook you can deactivate the Python enivornment in the terminal (close the Jupyter browser first):
(jupyter-astronomy) [lh59281@hpc2 ~]$ deactivate
[lh59281@hpc2 ~]$
The prompt changes back to the standard bash prompt and you can close the window and log out of your Virtual Desktop application.
Building Conda environments in Apptainer
Apptainer is a containerization technology forked from Singularity. It's free, open source and compatible with Docker and Singularity images. This has the advantage of keeping all of your Conda environment programs in one convienent file and avoiding conflicts and problematic entanglements with other Conda environments on the same machine.
Apptainer containers are built from a definition file, let's start with this example below:
Bootstrap: docker
From: continuumio/miniconda3

%post -c /bin/bash
    # Update and install system wide software here
    apt-get update -y
    # if you need apt packages install them here
    # apt-get install <package>

    # install conda stuff here, numpy just for example
    conda install -y numpy

%environment
    # Ensure Conda environment is in the PATH
     PATH="/usr/local/sbin:/usr/local/bin:/usr/sbin:/usr/bin:/sbin:/bin:$PATH"
     source /opt/conda/etc/profile.d/conda.sh
     conda activate base
Save this file to MyCondaEnv.def on a machine with Apptainer installed. HPC1 is a fine place to do this as we have Apptainer available there for building images. You can also do it on your local machine and upload the resulting SIF file to HPC1 at a later date.
Now is time to build the image:
apptainer build --fakeroot MyCondaEnv.sif MyCondaEnv.defThis may take a minute or two.
After it has successfully finished you'll be left with the MyCondaEnv.sif file. This is where the actual Conda binaries and packages are stored. Once created it cannot be modified and has to be rebuilt if you want to add a new package.
Now you can run the Apptainer image and interact with your data in one of two primary ways. Firstly through apptainer exec:
apptainer exec MyCondaEnv.sif conda listWhere everything after the SIF file will be run inside the container. This prints a list of installed conda packages. Alternatively you can use apptainer run and it will drop you into a shell on the container.
[lh59281@hpc2 ~]$ apptainer run MyCondaEnv.sif
(base) ls
AstroInteractives  Pictures           apptainer_test.sh                gauss_test.log       jupyter2                   jupyternoRoot.def  other_data       processing        test_mpi
Desktop            Public             conda.def                        gpu_test.bsh         jupyterhub.sqlite          lh59281_lambda     output-9604.log  shiny-server.def  test_mpi.c
(base)
Notice that here I just did a ls and it lists my home directory. You can any program installed in the Apptainer container on data stored in your home directory.
It is recommended to submit the actual running of the computations through Slurm or use Apptainer via the Virtual Desktops available in Open OnDemand.
Let's say you forgot a Conda package and need to add it. If you try to install it from inside the Apptainer shell you'll get an error:
EnvironmentNotWritableError: The current user does not have write permissions to the target environment.
  environment location: /opt/conda
  uid: 1002
  gid: 1002
These containers are create once, read only and easily rebuilt so the solution is to exit your container shell (Crtl+D) and make a new container. First let's update the DEF file:
Bootstrap: docker
From: continuumio/miniconda3

%post -c /bin/bash
    # Update and install system wide software here
    apt-get update -y
    # if you need apt packages install them here
    # apt-get install <package>

    # install conda stuff here, numpy just for example
    # adding astropy here for a rebuild example
    conda install -y numpy astropy

%environment
    # Ensure Conda environment is in the PATH
     PATH="/usr/local/sbin:/usr/local/bin:/usr/sbin:/usr/bin:/sbin:/bin:$PATH"
     source /opt/conda/etc/profile.d/conda.sh
     conda activate base
Now build a new container:
apptainer build --fakeroot MyCondaEnv2.sif MyCondaEnv.defAfter that has completed, run it as before:
apptainer run MyCondaEnv2.sifVerify the new packages are loaded:
[lh59281@hpc2 ~]$ apptainer run MyCondaEnv2.sif
(base) conda list | grep astropy
astropy                   7.0.0           py313h5eee18b_0
astropy-iers-data         0.2025.6.23.0.39.50 py313h06a4308_0
(base)
Conda Environments
Conda environments can be created per user. To create a new conda environment, simply run:
$ conda init
$ exec bash
$ conda create --name myenv python=3.10
You can use whichever Python version you want (or need based on packages you intend to install) and name the environment whatever you choose.
Activating an Environment
To activate your environment and install some packages:
$ conda activate myenv
$ (myenv) conda install -c conda-forge pandas
Any packages you install using Conda while you have myenv activated will be limited to the myenv environment.
You can see all of your environments with:
$ conda env list
The currently active environment will be marked with *.
Deactivating an Environment
To leave the currently active environment:
$ (myenv) conda deactivate
Removing an Environment
If you no longer need an environment, you can remove it with:
$ conda env remove --name myenv
Sharing Environments
Note that you cannot activate Conda environments created by other users. However, it is simple for multiple users to create duplicate environments if it is necessary that all users (for example, multiple members of a lab group) have access to identical environments.
First, save an environment file from the Conda environment that you want to copy packages from:
$ (globalenv) conda env export > environment.yml
$ conda env create -n other-env -f environment.yml
This creates a new Conda environment called other-env that installs all packages defined in environment.yml.
The environment name in the YAML file can be overridden by specifying -n when creating the environment.
Updating an Existing Environment
If an environment.yml file has been modified or contains packages that need to be added to an existing environment, use conda env update:
$ conda env update -n myenv -f environment.yml
This updates the existing myenv environment with the packages specified in environment.yml.
If you want to remove packages from the environment that are no longer specified in the YAML file, use --prune:
$ conda env update -n myenv -f environment.yml --prune
Use --prune with caution, as it can remove packages that were manually installed but are not listed in the environment file.
Exporting an Environment
To create an environment file that can be shared with other users:
$ (myenv) conda env export > environment.yml
This includes the packages and versions installed in the environment.
For a more portable environment file, you can export only the packages explicitly installed by the user:
$ (myenv) conda env export --from-history > environment.yml
The --from-history option is generally preferable when sharing an environment across different systems because it avoids including many automatically installed dependencies and exact platform-specific packages.